We’ve all heard it before, “Good writers write frequently, they practice and sharpen their writing skills by writing 500–sometimes 1000-1,500 words each day”. Practice makes perfect.
Stephen King makes 40 million dollars a year for his wordsmithing, and guess what? He writes 1000-2000 words every single day. He’s been doing this for decades, so if anyone’s getting practice writing, he certainly is! Is it any wonder that the people who succeed are getting practice daily?
Nothing comes for free. Not even talent– because it must be continually refined and updated and this takes time of course, precious time that you could be spending elsewhere. You’re going to have to get good at trying… attempting to write and doing it regularly. And you’re going to have to get good at being brave.
Now, here’s an idea, how about using your personal (or public) blog space to practice your own writing? You certainly don’t have to scribe your inner-most thoughts every single day or post anything too controversial that might turn you into a public pariah, but you can find something to blather about. I know you can.
If you haven’t noticed, this is exactly what I do here on this blog! I’ve committed myself to once-a-week blogging (which is writing, right?). My ultimate goal for this blog is posting 3 times each week. Do you have any long-term goals for your blog?
There are these random thoughts that come to me while I’m unloading the dishwasher. Sometimes they come while lying in bed just before sleep impales my brain. Perhaps a stranger makes a crass remark in a parking lot. More often than not, it is movement–physical movement–that triggers a cascade of thoughts. As writers, we all need a cascade of thoughts. We need a supply of input in order to have ANY output. Ironically, now that I have two children, I’m moving so much more and my thoughts are swirling but I have less time to write. These thoughts are the jewels that need to be mined.
In my mind I can think of the two most important things for bloggers:
Posting weekly/regularly.
HAVING CONTENT–you NEED something to write about, to babble about that has the potential to draw a reader or arouse curiosity.
People are unable to blog because of the 2 reasons I listed above. I promise. That’s it!
The content part is the biggie. There are far too many people out there who are worried to write because they HAVE FEARS ABOUT THEIR CONTENT. They worry about how they are perceived. They worry that:
A. they look like they complain too much.
B. they look like they’re bragging/being a show-off
C. they’re making too many (public) errors in their writing.
D. they’re writing is too inane.
E. they’ll leave some indelible mark on the internet so that people can, at some point in the distant future, point to what they wrote and say, :”hahaha, you wrote that piece of crap. You suck”.
F. People will think they’re mentally unstable
How about, who cares? None of these reasons are legitimate reasons for the passionate writer/thinker/creator. In fact, all of the above are great avenues for writing from time to time. Eventually you’ll find other topics to explore, but generating content is definitely going to be the thing you struggle with, so don’t let any of the thoughts above halt your progress if you happen to go into such territory.
Now how about a link with advice from an experienced writer to those of us beginners? Here you go:
My husband said we could come with him on his trip. He had a week-long educational conference in Los Angeles, a city I had never been to before. The hotel was already booked and his flight paid for long in advance.
“Are you sure? Don’t you want a reprieve from screaming children who interrupt your sleep? We would all be sleeping in the same hotel room after all. Why don’t you just go alone this time?”
“Why don’t you guys come? The hotel is going to be the same price whether you all come or I go alone. It would only cost me a couple extra hundred bucks for your plane tickets. The baby could sit on your lap.”
Iweighed the pros and cons. I knew how much work it would be to pack for both myself and the children. But I’ve done it multiple times before, right? I knew that lugging all the extra baby stuff around– car seats, car seat bases, a double stroller, baby carriers, diapers, bottles, formula, baby cereal, bibs and cloths and tons of extra baby outfits would be overwhelming. Of course, this doesn’t include all the contraptions I would bring for myself.
Eating out for all 3 meals (even if only “cheap” fast food) would add up fast. On the plus side, we would get room service every day. The children and I could explore downtown in the double stroller and experience the city-life, albeit temporarily. Meals would be no- fuss, no preparation or clean up–just throw away the packaging and wipe off the kids’ hands and faces. Finito.
“Oh, all right. If you insist. We would love to come.”
On my “list of minuses” I didn’t factor in the flight. What could possibly go wrong on a short two-hour flight with two tots?
THEFLIGHT
My husband and daughter sat next to each other on one row and I clutched onto our 6 month old across the asile. We sat next to an over-sized lady who was spilling over into our space.
Unfortunately for her, this meant my son would be thrusting his little feet into her fleshy sides throughout the flight. She didn’t appear to be the child-loving type either– as she squeezed herself against the window, hoping to merge into the the airplane wall and disappear from existence.
This doesn’t even begin to describe the misery my son inflicted upon this poor woman. Picture, if you will, an intensely high-pitched, screaming intermingled with an annoying whine, that lasts for almost 1 hour straight. It wasn’t just our airplane neighbor who experienced the cacophony of the flight. My baby’s screaming was enough to inspire the agitation of everyone on board.
Even the flight attendant tried energetically to distract the baby–offering him crackly packages of pretzels or crinkly plastic cups to playwith. “Won’t he take one?” She pleaded, as he threw the items onto the center aisle.
The baby refused to breastfeed. No matter how many times I tried, my efforts were met with even louder squeals as he pulled away. He’s not a pacifier baby either. My daughter was the same way.
On the other side of the airplane aisle, another battle was ensuing. My 2 year old was furiously trying to unbuckle her seat belt and jettison herself out of the seat. She was vigorously kicking her legs on the back of the seat in front of her. I’m sure a mild amusement to the passenger seated here. *Sarcasm*
My tot was requesting that the overhead light be turned on, then off. On, then off. She wanted the window shutter open, then closed, open, then closed. Repeat 693 times. My poor husband.
Once our flight from purgatory landed, we piled the taxi high with suitcases and baby equipment. Thankfully paradise was waiting for us.
We got to stay in the luxurious Biltmore Millennium Hotel in downtown LA among all the skyscrapers. This is a gorgeous hotel that is infused with art deco architecture. Shiny marble floors greet your feet. Bell Hops jump out of no where to grab your belongings and make your dreams come true.
There are towering ceilings in the lobby and hallway that lure the eyes towards paintings and sculpturesque adornments that flaunt every surface. For a fraction of a second, you feel like you’re in a European cathedral.
a
The next day, I took the kids outside our hotel for a spin in the stroller–something I would do every single day, all-day, until the day we left.
Clementine is California ready! Now to explore outside our hotel 🙂
One of the first things you notice about downtown LA–besides the exquisitely beautiful buildings, palm trees and perfect weather–are the bums. Demographics are ALWAYS the first thing I notice anywhere I go.
And you guessed it, I noticed right away that these homeless individuals were disproportionately MALE.
Throughout millennia, men have been more likely than women to fight in battles; many becoming wounded veterans. Men have been the ones to work in some of the most physically unbearable jobs like building cathedrals or castles with heir bare hands until old age, and then dying with little more than a legacy of brutal, laborious hardship (at least in Europe, that is). If you haven’t noticed, the male gender is ALSO more likely to be in prison or homeless– at least compared to their female cohort.
Does this reflect some sort of over-arching social inequality for males in modern society? Homelessness occurs for a variety of reasons of course–criminal history, physical disability, poverty, mental illness, a history of laziness or bad luck–and let’s not forget one of the biggest reasons–ADDICTION–but the gender issue is clear. I SAW MANY MORE HOMELESS MALES THAN FEMALES ON THE STREETS. Does mental illness disproportionately affect males? Many questions and thoughts like these were assaulting my consciousness.
I wanted to check out Skid Row and find out if my male-to-female ratio suspicions regarding homelessness were accurate. I pushed the double stroller in every direction within a 3 mile radius all over Los Angeles this past week and became familiar with the names of every street, but we never made it past Main Street (the tough area, let’s just say).
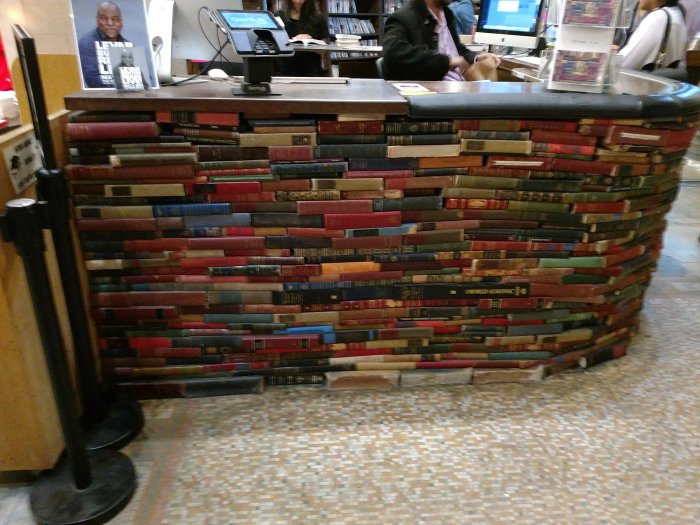
One evening, my husband was out for a conference related dinner, I strapped the kids in the double stroller for a night ride. We explored more territory and came across an incredible bookstore called, “The Last Bookstore“–I highly recommend taking a peek at this charming spot if you’re in the area. It’s quaint and stuffed with splendid books–both new and old. The cashier countertop is propped up by hundreds of old books. I even purchased a couple of books for the kids and came out with one for myself called, “The Perfect Nanny”, an international bestseller.
We found another amazing art deco building one day. Check out the stunning architecture and colors here:
I also took the kids to the LA public library. These were the murals on the walls inside the library:
…and the library courtyard garden was a delightful space for honing those Zen moments of contemplation.
Of course, we couldn’t leave without an arm load of goodies from the library bookstore.
We also spent an overcast day at the beach in Santa Monica.
And I made sure to take the kids to any park I could find in downtown LA anytime we encountered one.
Finally, on one of our walking excursions we found this neat HUGE antique shop, “Olde Good Things“. I regret not buying the cool antique globe I found.
We also went to Hollywood where we walked along the famous path of stars and Universal Studios too. What fun! I just LOVED the Simpson’s ride. Los Angeles was much better than I had expected it to be.
Surprised it’s not destroyed!?!?
One day I pushed the double stroller into the LAFashion District where there are material and fabric shops galore.
Pushing the kids around in the double stroller was entertainment for everyone. People stared in partial disbelief combined with surprise. Everywhere we went people were EXTREMELY KIND to us and made whatever necessary accommodations for the children.
FASHION DISTRICT, DOWNTOWN LA
Notice the kitty cat sleeping beside the sewing machine.
It’s difficult, I know. Maintaining general order in as many areas as you could attempt was that one thing keeping you sane, giving you some sense of comfort and control. You didn’t realize the sense of relief you derived from an organized, uncluttered, esthetically pleasing environment. You are a type A, an ambitious, non-time waster. You accomplish things and make plans. You’re not one of these people who allows messes to build-up. You don’t follow the crowd but chart your own course through life.
Alas, no more. Messes are strewn throughout every corner of your home. Whenever you make a laborious, time-consuming initiative to straighten one space, you’re being taken down in another– often 2-3 steps back. Your tot is creating havoc in every possible dimension with the help of a pair of gooey hands.
Meanwhile, you get to enjoy the non-stop screaming chorus put forth by your 6 month old. You’re frantically trying to remove objects that could trip anyone. You can barely think.
You’re not embarking on any kind of major “spring cleaning” adventure. You’re only trying to make your surroundings safe and prevent an ER visit. That’s it. If you had any spare moments you would be doing the have-to’s: diaper changing 2 kids, meal preparation, folding laundry, taking out all the garbages, vacuuming the entire house, filing the baby’s (longish) fingernails, taking a shower, …even these activities would provide a glimmer of hope that you’re succeeding at something.
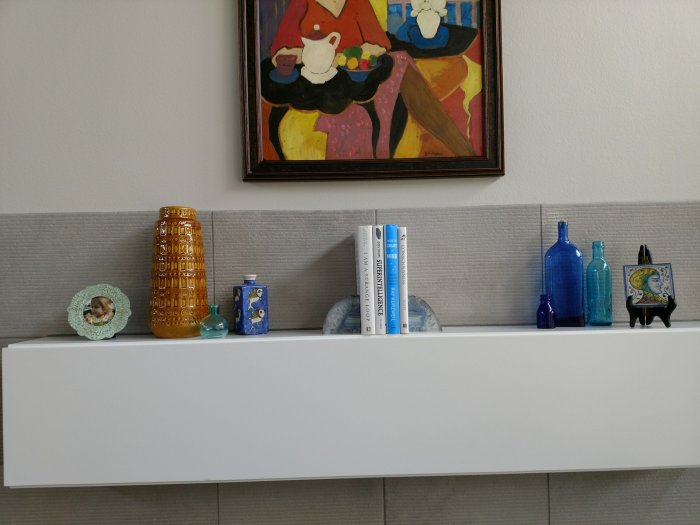
Tony Robbin’s aptly said, “Happiness is Progress”. But it’s so hard…because you’re not getting this feeling of progress. Ever. And to make matters worse, you’re a perfectionist so this is kind of your M.O. You live for the feeling of progress. Here is a picture of our mantel: This is how I think of perfection…or, my-kind of perfection, at least. Ahhh, this is what I like.
And this is my kind of imperfection–our house when we first moved in. Stuff everywhere, in disarray. And, to be honest, there are many days where it looks like this ALL OVER AGAIN. This is what I don’t like. My cortisol levels
I often like to joke, “How does one torture a modern, western woman?” ANSWER: You prevent her from accomplishing anything. No career for you, young lady. We will just give you some money “to get by on” and you can clean up all these messes over and over again and you won’t have to learn anything new. Bonus, we’ll bring you fast food and prevent you from exercising.” NOW THIS IS TORMENT.
Joking aside, How can I ever get away from this incessant, mind-overtaking need to be a perfectionist…to get things done and done perfectly? I honestly don’t know. I’m trying different strategies right now. .. everyday. What to do…what not to do.
I guess what I’ve learned aboutmyself is that I do many things for my own psychological comfort– not because they are that necessary. I want to learn as much as a I can because I want to have the skills and education to fall back on if I were to need them. We all are lucky and unlucky at different points in our lives. It’s easy to assume that you’ll always be lucky or that you’ll always be unlucky. You’ll probably cross back and forth on that road a few times in life.
I’ve recently decided to turn down my perfectionism a few notches. That is, I pick one (maybe two) areas where I allow myself to be a perfectionist. It’s important for us perfectionist-types to have at least 1 area where we can still manage our perfectionism–otherwise, things seem so chaotic to our brains that we can’t even think. For me it’s floors. I hate dirty floors. So I let myself vacuum frequently; every other day for sure…sometimes every day. The other area that I’m committing myself to (besides occasionally taking care of the children) is exercise.
So that’s it. I had to set some limits. I give myself 2 areas to be a perfectionist and try to let the rest go until I have more time in my life. Once I get more time, you can bet that I’ll be crazy.
I knowwhat you’re thinking, “That’s a terrible title”. No it isn’t. You clicked on it. And net traffic as well as ‘time spent on a site’ is the best indicator for Google’s ranking of your content.
We have 1 television (1 TELEVISION) in our home and it’s in our bedroom. I firmly believe that young children should be exposed to very few (if any) weekly screen-hours as possible.
But why? Aren’t there plenty of educational programs that act as free babysitters? Yes. Most are these days. Why rant against T.V’s or screens?
It’s really not so much what your children watch on a screen, but how long they watch it and how emotionally affected and attached they become to it. Since I never developed the habit of “T.V. watching” during childhood, I’m a bit biased. You’re free to scroll past this post if it bothers you. I know there will be plenty who disagree.
I tend to see T.V.’s net benefits as: 1. Fun entertainment that dampens original ideas and 2. time waster (which, I guess, isn’t a net benefit, is it?).
Compared to most of my peers, I spent very few hours seated in front of a screen or even watching movies. But this wasn’t because my parents thought that TV resulted in a “lack of original thinking” or that it “suppressed imagination” (i.e. the reason many educated parents limit T.V. viewing). My mother would comment that television was “too sarcastic” and that it didn’t “provide good morals”. Hence, my brothers and I were not allowed to watch The Smurfs.
We were allowed to watch endless episodes of Leave it to Beaver and my parent’s bought plenty of wholesome Christian inspired movies for us to watch. These were not very enticing. Needless to say, with these alternatives, I simply stopped watching screens. Sure, I watched a few movies here and there throughout my childhood and teen years, but certainly not enough to be able to recognize even the most well-known stars.
So, what’s really the problem with T.V./screens then?
In the end, what TV does is it makes everything else in life seem boring. That’s it. Life is already quite boring for most adults. For young children, the television seems to quickly desensitize them to their once bright and novel surroundings–those things ready to be used for unstructured play–and makes them seem comparably boring.
Furthermore, television, movies and social media homogenize. They make a bunch of people who all talk and think, more or less the same. It encourages a sort of mindlessness. Ever notice how people are seemingly always quoting from movies instead of coming up with their own phrases?
We know that most adults have already been desensitized and/or spoiled to some degree. Children, unless exposed to lots of screen-time, still maintain an air of unspoiled excitement for the mundane. I think its preferable for children to hold onto this tendency as long as they can. It will eventually teach them how to create their own solutions for boredom–how to transcend boredom using their very own intellect and imagination. They might discover hobbies, educational pursuits or even entrepreneurial ventures in the mist of being bored. And this is because they are forced to find a remedy for boredom on their own.
Being able to defer gratification and envision the bigger “future reward” is a skill that can be developed at a young age. I think it’s very important to help your children hone this skill.
A couple months ago we were letting our tot watch 2-3 episodes of a children’s program from Amazon each week. It’s called “Tumble Leaf”. I noticed that on the days that she viewed, she became increasingly angry–even hostile–once the show was switched off. She would throw tantrums–as if she was having withdrawal from her favoritedrug. She would screech and thrash on the floor for long periods after the television was off. This made me realize that she was really developing an unhealthy attachment to this program.
The past few weeks she has not been viewing any screens. Before Tumble Leaf, the only shows/movies she watched were: Bambi, Dumbo, Snow White and a few nursery rhyme songs on YouTube (only a couple times each month–at most, and it was when we were in a restaurant or some other public venue where she wouldn’t sit still.)
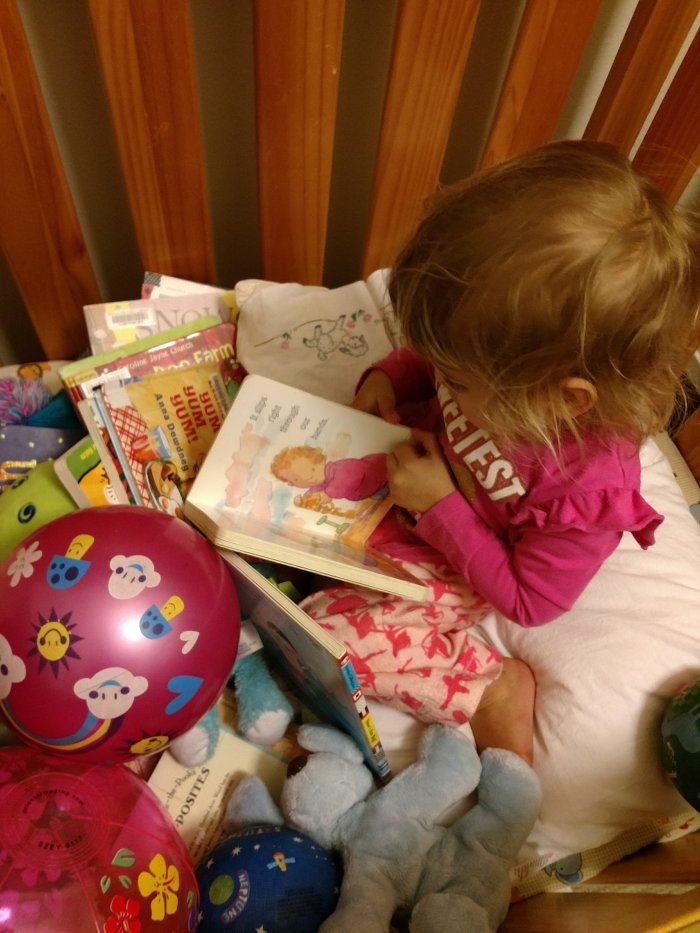
In other news, I’ve started to incorporate weekly LIBRARY TRIPS into our schedule. I’ve been very consistent the past couple of months. Every week we go to one of the libraries here in our city and I pick out 15-30 books for her each time. This way, at night, after I read to her and tuck her in and she begins her 2 hour screamfest, she ends up being distracted by her new library books. She will sit and look through them until she falls asleep. This is a great way of preparing her to be a future reader while also calming her down before bed.
Turning the pages of a book is much slower-paced than television, computers, tablets or phone screens. There is a much-needed confining or “restricting” quality to books. She learns to delay instant gratification–because she has to go through the physical effort to turn the page in order to find out what comes next.
Compared to a screen, she will likely spend more time on each page, looking at all the interesting pictures, colors and letters without being constantly offered the opportunity to “click elsewhere”–as you see on YouTube videos. She will develop a strengthened attention span as she appreciates all that she is seeing on each page. She might also want to go back to a previous page, and look for what she may have missed. By starting with books, I believe this will instill a deeper and fuller approach to learning…ANY SUBJECT. It kind of paves the way for “how to learn”.
It is this slow, methodical approach to learning that can teach your child how to learn all things.
In the end, it will be books–more than any other object in your home– that will prepare your child’s mind for school learning. They will need the necessary skills to sit still at a desk for a period of time to listen to the “boring teacher” and to read/go-over the “boring paper materials” and books presented to them without constantly jumping from one thing to the next.
I’m willing to bet that over time, a phone, tablet or other screen-type device will inadvertently teach your children how not to focus. I’m convinced that these devices will teach your children to become dependent on them for ALL (or, most all) of their fun.
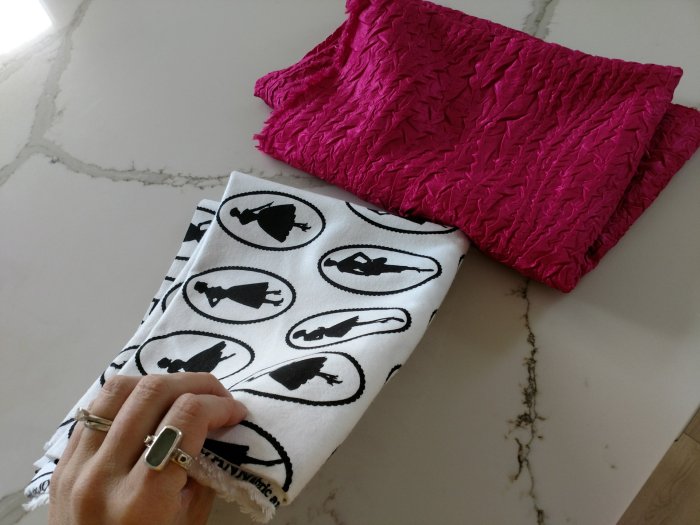
Yes! I found really cheap fabric in the Joann Fabric discount area. The pink fluffy stuff was $2.50 a yard– and the black and white stuff was roughly the same price– maybe $3.00 per yard.
I agree. Time is money too. But if you’re learning a new skill on top of getting a new outfit, I think it’s well spent.
So I spent $5.50 for this fabric here:
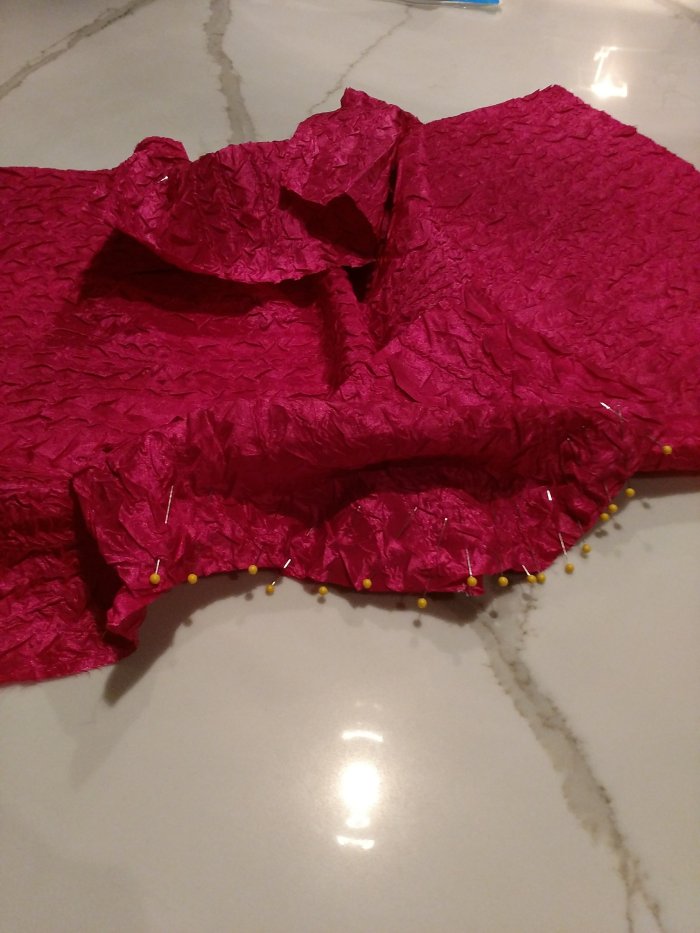
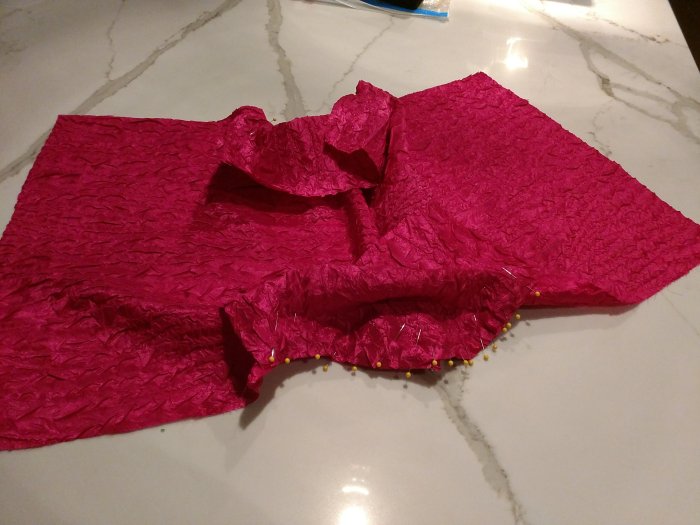
Then I went to make the shirt. Yes, I’m still practicing on my “shirt making”. I have a long way to go. Sleeves are such a pain but I’m slowly getting the hang of it.
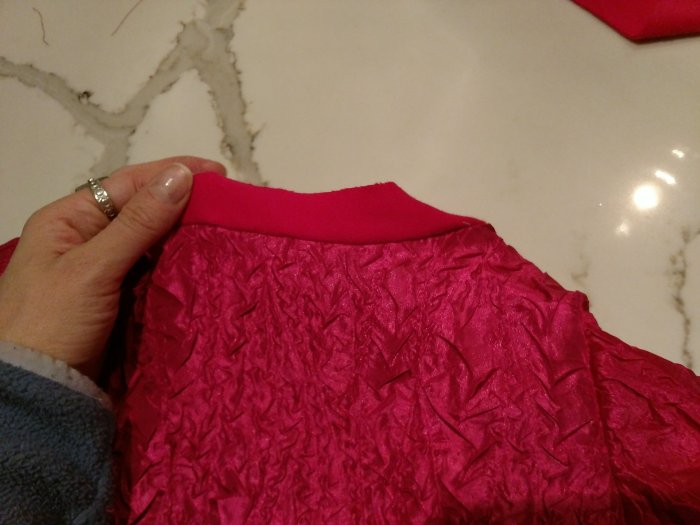
I found some pink Terry cloth scraps from an old project to use for the shirt collar.
And…done. pink toddler shirt for $2.50. Plus, I have fabric leftovers for something else.
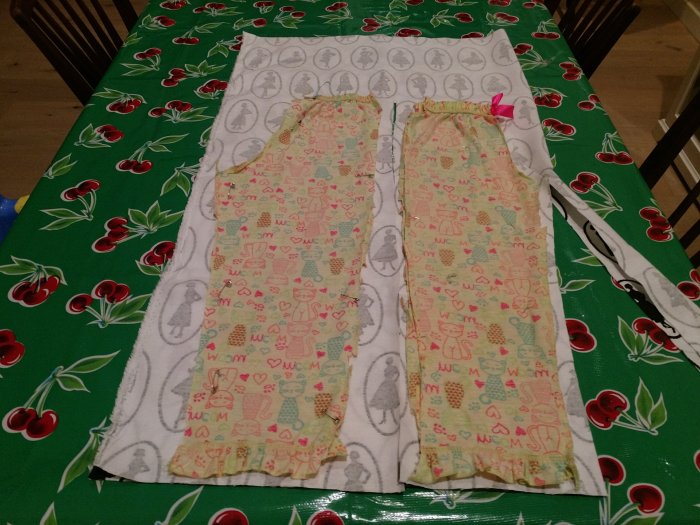
Now, for the pants 😋 using an old toddler pants pattern.
And here they are! Adorable pants with 2 inch width elastic waistband. They’re slightly long so she can wear them for a long time.
Here she is with her new shirt. Based on her facial expression, I think she loves it.
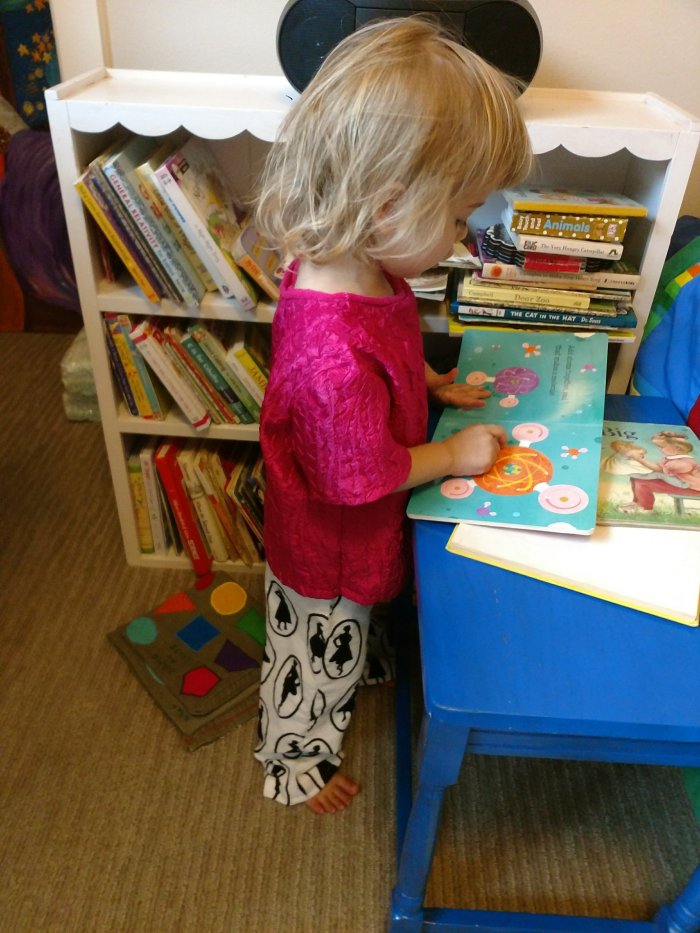
And here…with the entire outfit on. Looking at books in her bedroom.
Now that I figured out how to make blog posts on my phone I can make content while I nurse my baby. But he’s super interactive with hands flailing the whole time. We will see if I can complete this post.
I’d like to blog 2-3 times each week if I could find the time– but for now, I’m staying committed to my 1x per week at least– no matter how bad or weird it is. Blogging is as much about getting into the groove as it is about thecontent.
To preface this post I’d like to be clear that I never really follow recipes, so I apologise for not being very decisive with the instructions. I just can’t get myself to do it– I feel like I’m locked in a straight jacket. Plus, l always learn something memorable when I make a mistake.
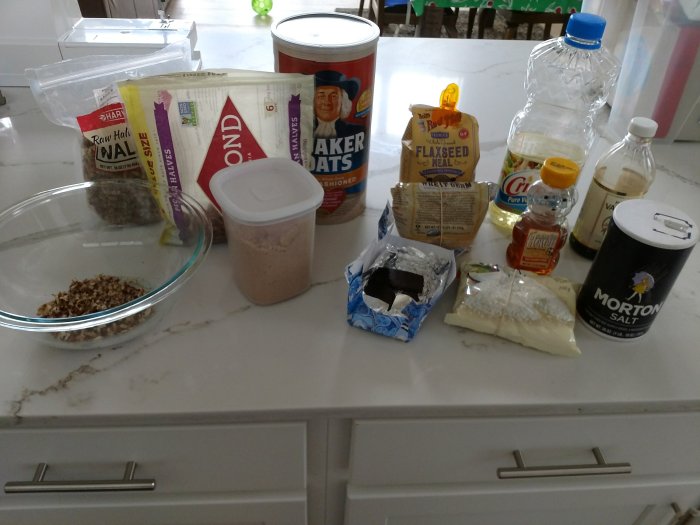
Today I woke up to find our 1 cereal box was almost empty. While disappointing, it wasn’t tragic.
I realized that I had a variety of on-hand items that might be concocted into granola.
Things like: oatmeal, shaved coconut, pecans, walnuts, dark chocolate, flax seed meal and wheat germ. Honestly, these were all I had. My raisins had been depleted a couple weeks ago and I didn’t have any dried cranberries or pumpkin seeds that so many recipes suggest. Oh well. I had enough items to make it work. A practical point in being creative, for me, is figuring out strategies to use what l already have– for as little money (and as few trips to the store) as possible.
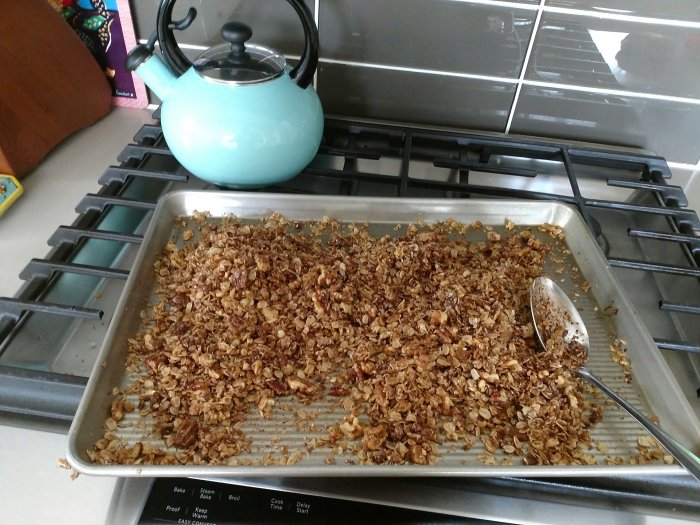
The main thing you need to make granola is oatmeal. I found some random items here:
Recipe:
3 cups oatmeal
chopped walnuts (3/4 cup more or less)
chopped pecans (3/4 cup more or less)
Coconut flakes (I used 1/2 to 3/4 cup)
1/2 cup flax seed meal
1/2 cup wheat germ
Brown sugar (to your preference)
Broken up dark chocolate bar (or chips or whatever you have)
Dollop of honey
Splash of vanilla
1/2 tsp salt
1/4- 1/2 cup vegetable oil
300 degree oven and bake for 10 minutes? Or whatever. Just don’t burn it.
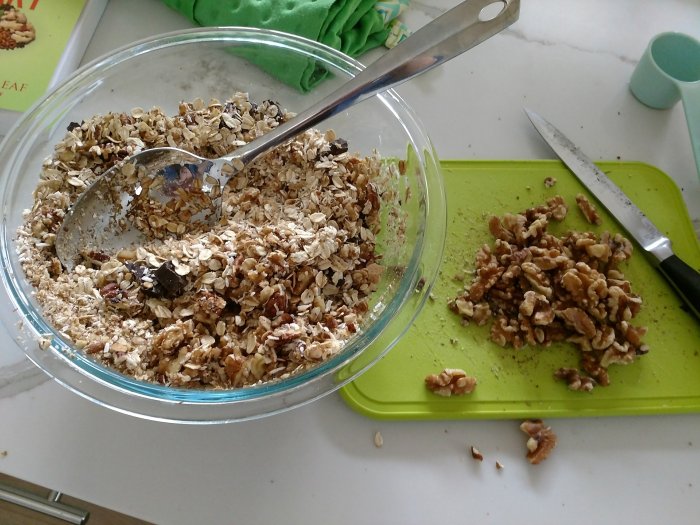
Mix everything up:
Spread on cookie sheet:
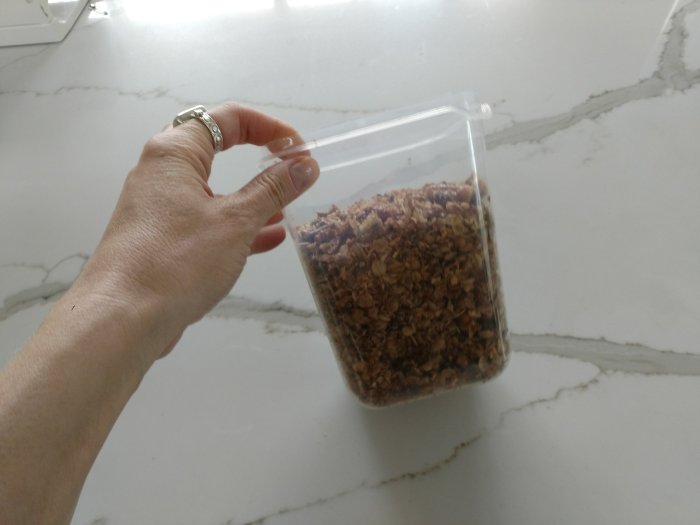
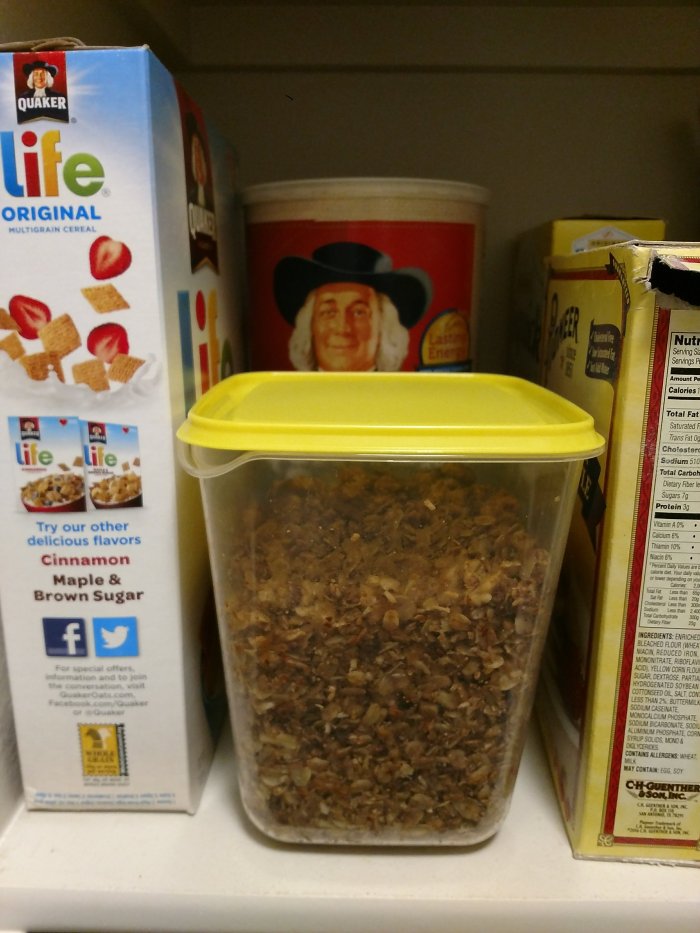
And store your freshly baked granola in an airtight container.
It tasted delicious! Now to store by in the pantry. 😀
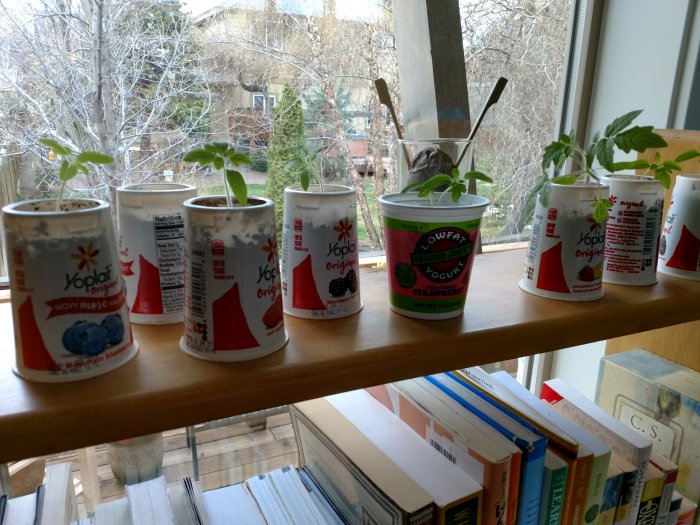
In other good news? Guess what? Our tomato plants that we planted from seeds are finally growing! You probably remember this blog post: Greenhouse where we planted them.
Well here they are. Tiny tomato plants finally popping out of yogurt containers. They’re growing!
Why is blogging regularly so difficult? It’s probably because many of us who are attracted to this hobby happen to be perfectionists in the first place.
We also tend to be a bit ostentatious at times– as we like to show off our stuff, thoughts, writing etc.. (What person would venture into such arena if they didn’t have a smigeon of this trait?). Your writings, expressions and pictures are going up public– for anyone to see– and you know that.Face it. You’re a bit of a show- off.
There’s nothing wrong with any of this. You need to be a bit showy to make this work. Embrace the “braggy” side of your blogging personality. This will help you in the long-run because without content, you just have a user name and password– and an empty blog.
It’s the “perfectionist” side of your personality that will be holding you back. You’ll want to express yourself but come to realize that’s it’s a bit weird, the ending is rough, your point wasn’t made, and the esthetics of your post are off-putting. That’s okay. You can’t please everyone. And apparently, not even yourself. So let go of the perfection-tendency and start writing and posting frequently.
We’ve all heard that it’s “quality content” that sets you apart and makes you stand out in Google’s search ranking. This is true. The point is to have something that is interesting enough so that people come back or view other posts on your blog. You’ve snagged someone then and Google seems to know. This is what “quality content” means.
Keep writing and pressing forward but most importantly, keep thinking. After all, it’s from these random thoughts that sprout throughout our days that provide the fodder for our blog posts.
Fertility festivals are now being celebrated throughout the northern hemisphere so why not throw your own spring party?! I decided we should welcome spring. You know how that goes. This time I decided not to go “full pagan” but instead, decided to whip up a cake from scratch in the shape of an egg and throw a little tea party for the kids. Still too pagan for your religious preferences? Well next year we’ll be making cake crosses to celebrate Easter. This cake was my first (decent) 100% scratch cake. We even made a couple crafts to celebrate the season.
Yes. I did try and make a cake from scratch before. Once. For my husband’s birthday. I told him I was going to make him a Sunshine cake. He thought it was a cute idea but was in for a terrible surprise. And it was a disgrace to mankind.
MY CAKE DISASTERPIECE of 2016. PICTURED HERE FOR YOUR VIEWING PLEASURE:
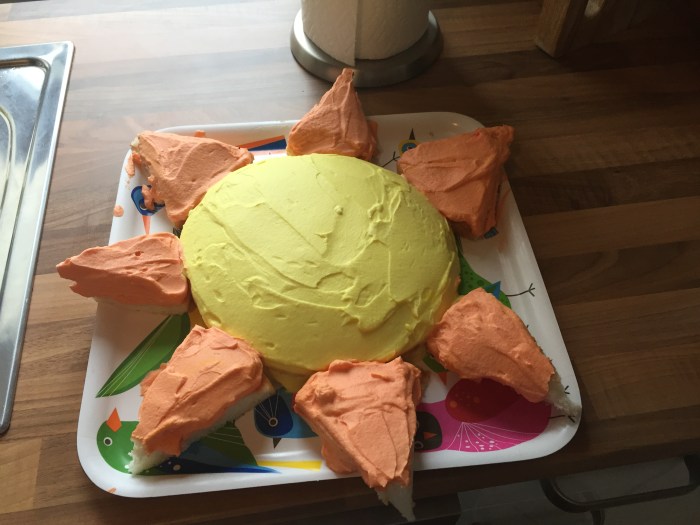
So, as you can tell, my cake baking skills have improved a bit. I’m just slightly proud of this little beauty– mostly because I thought up the idea, the colors and the name of this cake when I was playing around with the frosting color.
My “Robin’s (Easter) Egg Cake” 🙂
NOW HOW DID I DO THAT? Here are some pics (and I’ll post the link to the cake recipe below). What a fun way to usher in the springtime than a splash of Robin’s Egg blue on your Easter eggs–or, in this case, cake?
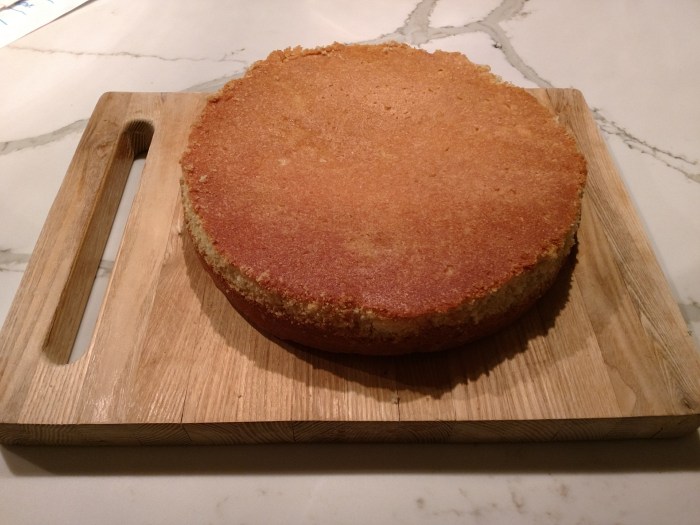
Once I baked the cake, I removed it from the pan and flipped it over (sometimes the top of the cake is caved in a bit or dimply). ALWAYS FLIP YOUR CAKE OVER IF YOU’RE AN INEXPERIENCED BAKER LIKE MYSELF. The bottom is just so perfectly flat and ideal for frosting. My cake looked like this: caramelly sweet, dense, moist and just delicious!
After the cake cooled, I wrapped it in plastic wrap and let it sit over night. NOW THAT IS THE TRICK TO FROSTING A CAKE! If you do this, you are much less likely to smear crumbles of the cake into your frosting during the frosting procedure. Do you know what I’m referring to?
Then I cut an egg shape out of “cereal box” cardboard to use as my template for cutting the cake. Yes, I salvage all my cereal box cardboard for a variety of uses 🙂
I cut the “egg shape” of the cake the following morning:
I made my frosting and prepared several bowls for experimenting with colors to use.
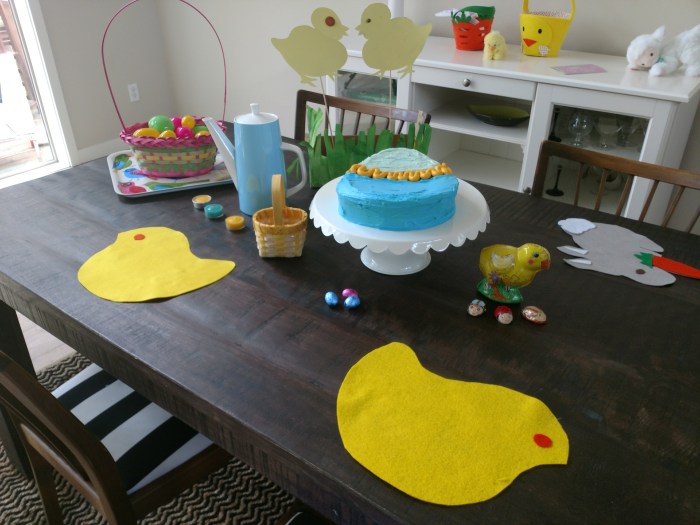
Voila! Our vernal celebration.
I also thought-up these little chick and bunny rabbit placemats from some scraps of felt I had laying around. Just use a template that you have on hand (I used a chick plate–sorry, breakfast remnants still stuck-on) and a hot glue gun to seal on eyes and other features like cotton tails and carrots. SUPER FUN! I will be using these for next years spring décor too.
Here is the cake recipe link (the only thing I did differently was use 4 eggs instead of 5, bake for 35 minutes instead of 25 and I substituted whip cream for buttermilk–only because I didn’t have any on hand). The cake tasted delicious!
Also, did you notice the chicks standing in the grass in one of the previous pics? That was one of my “dumb creations”. Just make cute chick cut-out’s from your old cereal boxes, paint them yellow, glue to skewers and prop them up in a box
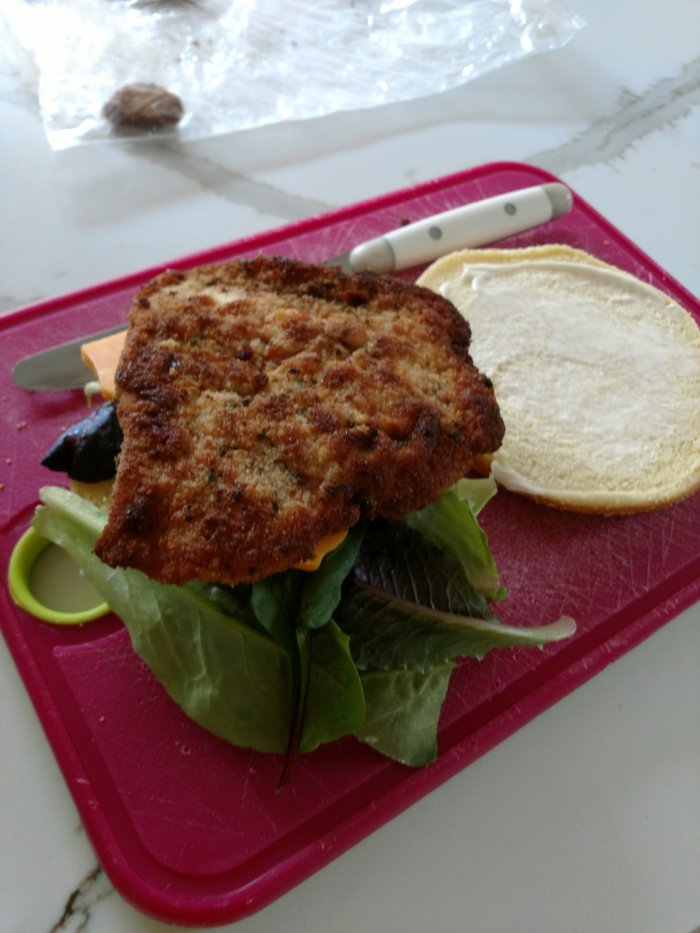
A couple nights ago my husband suggested that we make Chicken Snitzel for dinner. Reminiscing of our 3 years spent in Germany, I thought, of course! Let’s try it.
It was a very simple recipe and you make it just like you would make a pork or Weiner Schnitzel.
The trick for any Snitzel recipe is to use fresh meat (preferably meat that you just purchased) and then brutalize the life out of it with your kitchen mallet. For chicken, you won’t have to pound the meat as much.
1.Season the chicken cutlets with salt
2. Dip in flour (shake off excess)
3. Dip in egg (shake off excess)
4. Dip in Garlic and Herb Breadcrumbs.
5. Fry in 2-4 inches of vegetable oil.
5. Blot off oil.
6. Put on Kaiser bun with your kind of condiments.
My Sock Drawer (I think 2 pairs of my socks are in the laundry):
Currently, all of my socks have holes in them (for the past couple years) so It dawned on me that I should get some new ones. But who wants to buy socks? And for the going price of nearly $12 a pair, I don’t think so!
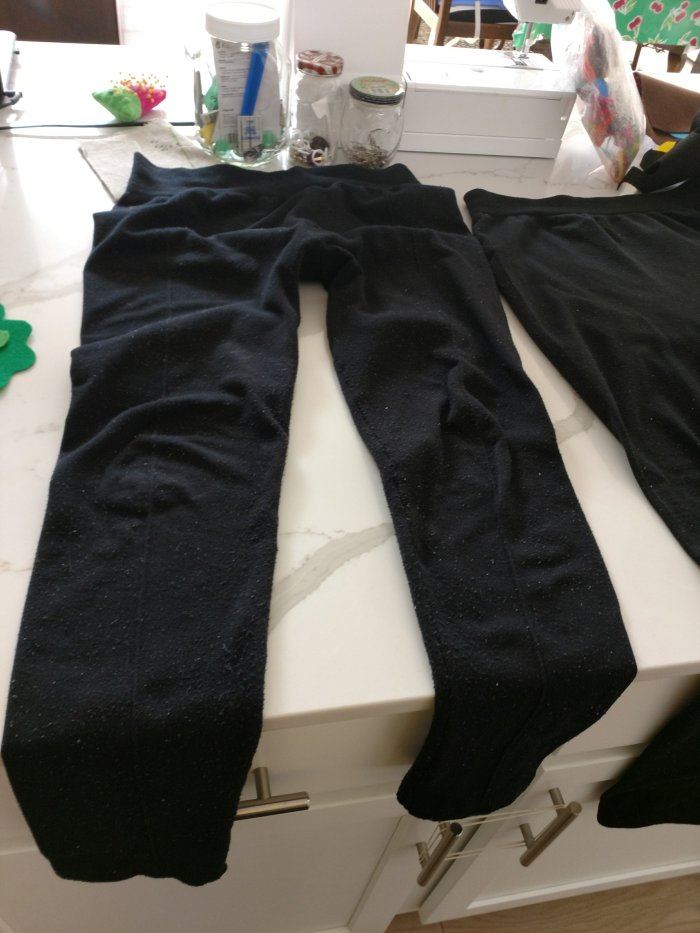
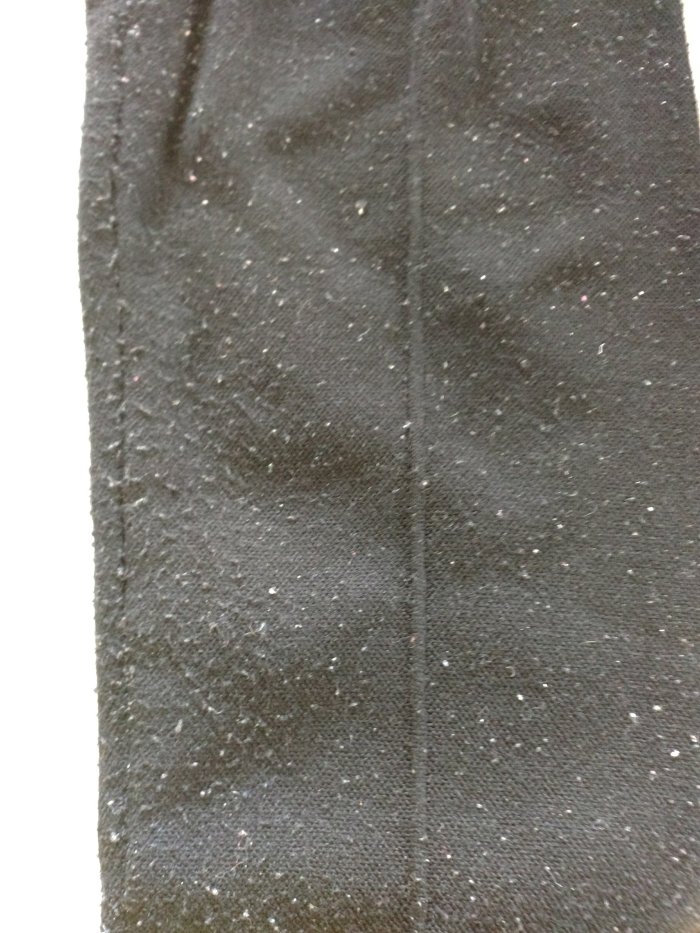
What I decided to do was take some stretch pants that are full of pillings, fuzz and damage and turn them into socks. I thought, once turned inside out, they would be perfect material for a snug pair of socks.
You know when your stretchy leggings start to look awful?? Sure, you bought them at Ross 4 years ago for $6.99– but they’re ready to be recycled now.
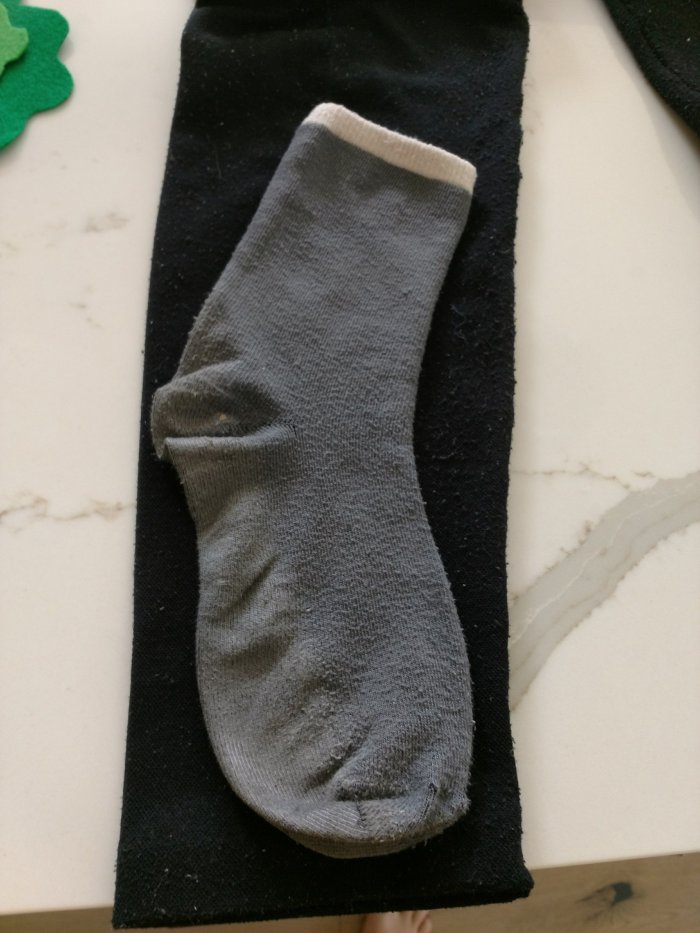
Well, let’s turn them into socks, sounds Good? Use an old pair of your socks like this as a “template”. Next, cut around the sock and sew!
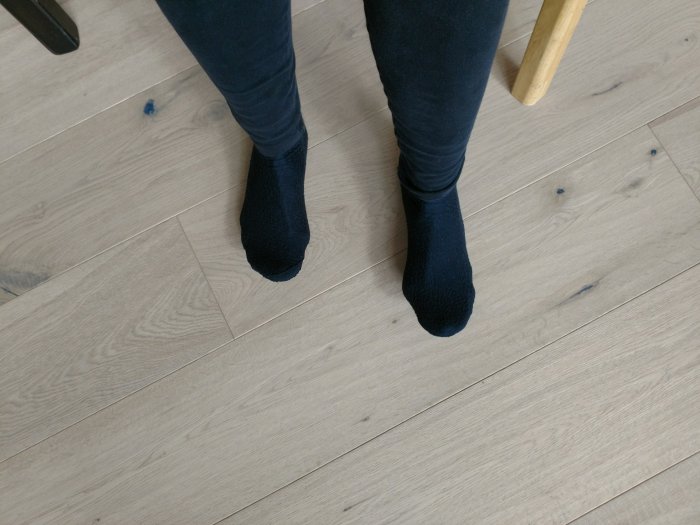
Here they are on my feet. Socks from old worn out leggings– they FEEL GREAT!
I’m sure with this pair of leggings I can probably get 3-4 pairs of socks! Also, make sure and save the waist elastic from the leggings to use on another sewing project!
I plan to make a bunch of socks over the next few months so please stay tuned!
PS: This is my first blog post I did 100% on my phone while simultaneously breastfeeding my baby. A bit tough, so excuse the cursory job. Now to change a diaper.