I Reupholstered An Accent Chair with MY MODERN MAJESTIC DESIGN (SEWING INVOLVED!)

I Reupholstered An Accent Chair with MY MODERN MAJESTIC DESIGN (SEWING INVOLVED!)

After two glasses of Port I think I’m a bit uninhibited and so I’m blogging again….You have two options: A. Leave or B. Forgive me

I keep mentioning that I’m going to reupholster old chairs I got at a flea market in Germany.

A couple years ago I bought BOTH of these lovely button tufted accent chairs for $70 at the American Ramstein Airforce base. What a terrific deal! As you can see here, chairs of this nature are not cheap: I was told that they were airport seats from France circa 1960. Waaaait whaattt? French airport seats from 1960?!? I fell in love.

img_20180413_174454232_hdr

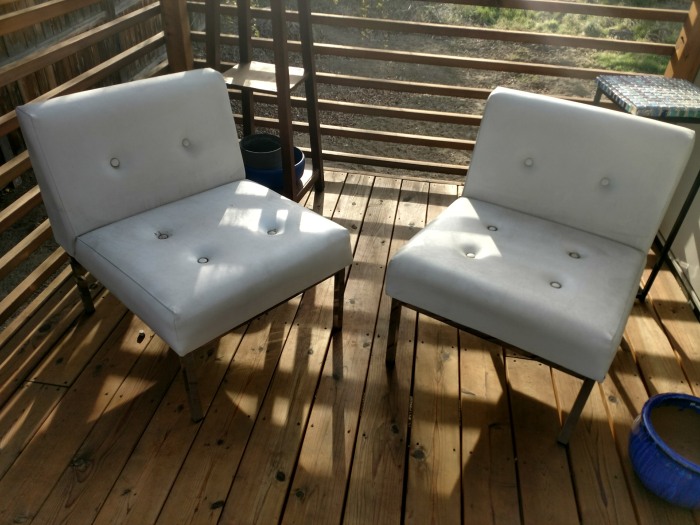
But the vinyl has started to break down in places and become very dingy–even spray paint would not fix it :(.  Be careful when spray painting vinyl, it can leave a sticky, (nearly) permanent residue as it binds to the material. The particle board underneath the vinyl was literally starting to crumble apart.


I decided to embark upon another reupholstery venture, at least for one of the chairs. This time, it would be more challenging as I would need to sew the vinyl covers for the chairs. I would also need to cut out new pieces of wood to affix to the foam (thanks Dad!); particle board doesn’t last forever.

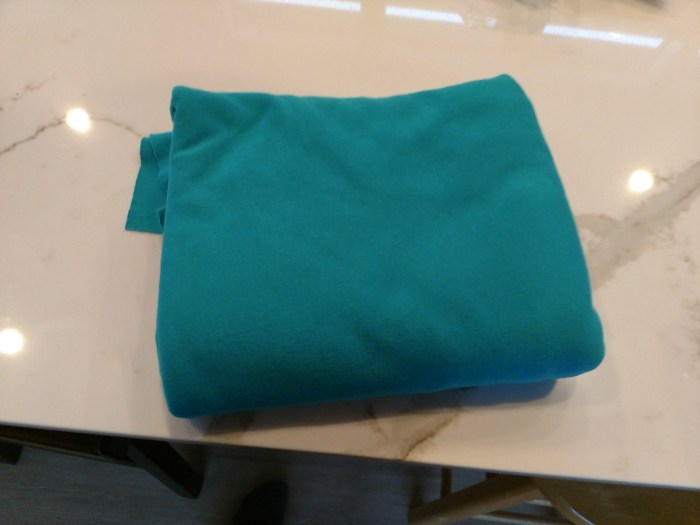
Make sure to cut off all the vinyl pieces neatly so that you can re-use them as your pattern. I decided to use a bunch of extra blue vinyl left from my previous chair project that you can see here.


Cut out your new vinyl using your old vinyl as a template. I’m just using vinyl scraps that I had from my previous project (so I didn’t purchase any new materials for this project).

It turns out that sewing coverings for chairs is akin to sewing clothes. Sewing the sides of the chair is almost like sewing sleeves. NOT FUN:

I want to be honest. This was one of the most difficult sewing tasks I’ve yet attempted. YOU KNOW HOW HARD IT IS TO MAKE A PIECE OF MATERIAL FIT SNUGLY TO SOMETHING ELSE? At one point I started to re-do my project. I decided to add in a couple stripes of another color of vinyl (teal) to my chair to give it a bit of flair:

img_20181010_151159131

I won’t bore you with the details–this chair was a REAL struggle. Finished results are here:

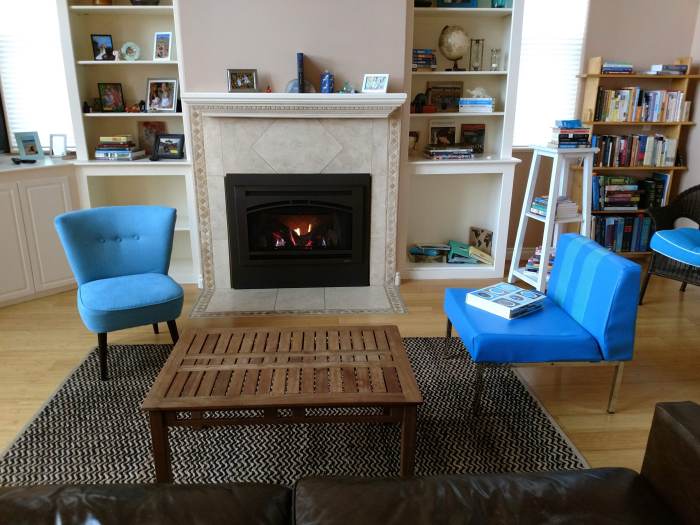
It’s the chair with the book perched on top of it. It offers some exquisite modern beauty to our living room: I’m so proud of my striped vinyl design–all from scraps!

img_20181013_110011720_burst000_cover_top

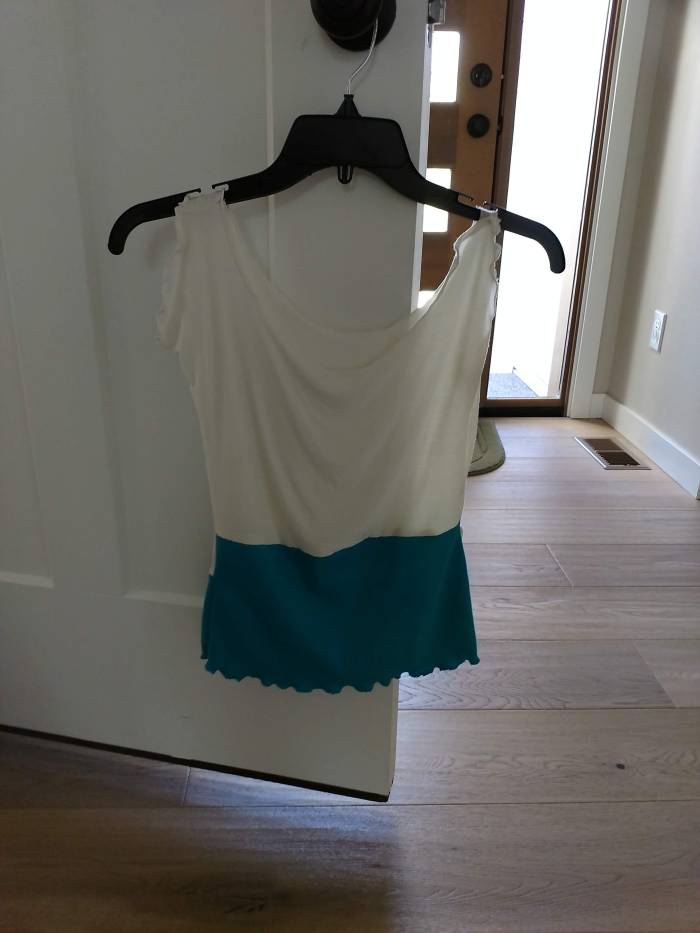
And what to do with some of the extra scraps of vinyl lying around? Attempt to make a purse, of course!

img_20181018_102711107

Yes! I still need to reupholster the other chair. To be continued…

We have a big paint job coming up and I will share the details for that too. All of those salmon colored walls in our living room? We’re turning them white.


Advertisement

I MADE A SUMMER TANK TOP (AND A YELLOW SKIRT TOO!)

I MADE A SUMMER TANK TOP (AND A YELLOW SKIRT TOO!)

I think it was Jordan Peterson who said, “Compare yourself to who you were the day before, not to who someone else is today.”

Learning to sew clothes has been a trial and error process–but I’m learning to compare my sewing to how I was sewing a few weeks ago…a few years ago. I’m terrible with spatial cognition. I don’t see things very quickly. My visual processing speed is delayed (compared to others) and my mind has a hard time manipulating objects in space and considering alternative, yet accurate positions.

Sewing has been a rough pursuit but it’s EXACTLY WHAT I NEED. I need to have some outlet for strengthening these intellectual capacities. Even better, I get to meld my penchant for creativity and art with this hobby. I don’t think there is any activity that gives me more FLOW than attempting to SEW. Sorry. Bad rhyme.

It’s the designing part that really draws me in. Attempting to design a piece of clothing and then sewing it. Ahh, nothing feels quite like it–especially when I get it roughly right. Painting is a close second.

I’m realizing that I need to take more risks with design and sewing. I often worry that “I’ll be wasting fabric”, so I hesitate to try something. It’s super easy to mess up! I’ve done it repeatedly even when making a fastidious effort to follow instructions.

If I go all the way off the tracks, can’t I expect to have a mess on my hands and fabric that will end up becoming pillow stuffing? YES. But compared to nonexistence, making mistakes is BLISSFUL!

I’ve started to get more creative and worry less about my final product. I work with what I have–mistakes and all, and try to come up with something. So far, I’m figuring things out.

I was having THE MOST DIFFICULT TIME with this TANK TOP that I designed. It would be the first shirt/tank top I have made for myself. I made enough mistakes to call it quits. I kept adding on and cutting and changing things around.

I used a knit fabric and here is where I started. I also added some teal knit fabric to it because the tank top WAS TOO SHORT.

img_20180415_191709718

And here is my final result! I zig zag stitched the edges around the tank top and a ruffle emerged! INSTANT FASHION!

If you look closely (or maybe even from a distance) you’ll notice its asymmetric. Not on purpose of course, but I’m pretending it was intentional. You can see how the sleeves/shoulder straps (or, whatever you call them) are of different widths.

Not gonna lie, I LOVE IT! IT FITS PERFECTLY. Then again, you’ve got to be pretty bad if you can’t fit into a knit!

I’m just so pleased with it, especially considering how it was looking beforehand, how I didn’t use a real pattern…I just pulled it out of no where. Adding that extra strip of teal fabric from my stash not only added to the length–which I desperately needed–but gave it a fashionista look.

img_20180725_1141072591

To think I almost threw out this wad of fabric, but I kept going with it, kept playing around.

I’m so happy I kept playing around with it! It fit perfectly–as knits have lots of stretchy give to them. Perfect for hot summer.

Here is some cheap fabric that I bought from Walmart. I had pieced it together–almost like pillow cases and then started to randomly sew. I didn’t know what I was doing here. I thought, why not sew it all together and form it into a skirt?

img_20180603_175203026

And here is my final skirt result after MANY CHANGES. It was tough to get it just right! I installed a long, 7 or 8 inch zipper in the back and lots of random, off-kilter darts. But who cares? Notice that I added a piece of fringe polka dot fabric on the bottom for extra flair and zig zag stitched the edge! Still, a very simple look.

The trick to making a skirt is wrapping some fabric around your waist and then going from there. That’s all I do. Once you have a rough idea of how much fabric you’ll need for your size, you just start sewing. Towards the end you decide…do I want to add a top waist placket? Do I want to add a zipper or elastic? You can make those decisions later.

The best part? It FITS PERFECTLY! Hello Summer. I feel like I should be behind a Lemonade Stand or something.


img_20180725_1428336392

How about some homemade lemonade spiked with some Pinot Grigio? Chilled white wine is PERFECT for a summer evening on your porch with your Kindle. I’m still trying to finish Ben Sasse’s book “The Vanishing American Adult”.

img_20180727_181006940-collage

The key to sewing is not being discouraged by Nazi seamstresses who keep insisting that “There’s only one way to do it”. 

Keep trying and keep thinking up creative combinations. You don’t have to follow someone else’s script. You’ll improve with measurements and sewing machine accuracy eventually–but let that go for now! Put your focus on the fun part–THE DESIGN! It will motivate you to keep going!

img_20180725_1515156643

COLD BREW COFFEE RECIPE and PAINTING GAUGUIN’S, “THE YELLOW CHRIST”.

COLD BREW COFFEE RECIPE and PAINTING GAUGUIN’S, “THE YELLOW CHRIST”.

This week has been one heck of a ride. Lot’s to be excited about and lots of future adventures on the horizon that I’ll be blogging about. I’ve been doing some “copying” lately with regards to recipes and, well, famous paintings. Learn from the best right? Sometimes creativity is playing around with other people’s ideas–make sure and give them ALL THE CREDIT, of course.

Another thing…I failed at a scratch banana cream pie. I noticed that I had extra whip cream and some bananas (about to go bad), so why not attempt it? It turns out that cooking custard and getting a desirable consistency is something only genius cooks with arcane culinary and mathematical skills can master.

Here is my pie. But I won’t ruin your moment and display the runny, slushy middle. It tasted AMAZING. Impeccable freshness with a deliciously thick homemade graham cracker crust. However, the consistency of the filling was WAAAY off–even after allowing it to set for 6 hours uncovered in the fridge.

Making a “firm enough” custard filling is one of those precarious situations. You better not undercook or overcook it and it has to be done accurately within 5-7 minutes on your stovetop. You have to stir rapidly during the boiling process (no distractions or multi-tasking). Oh, and don’t let your custard brown on the bottom of the pan during your 5-7 minute boil. It’s very difficult to achieve a decent result because the parameters are so strict. Don’t accidentally scramble the eggs either–you’ll get lumps.

I don’t want any liability or litigation, so I won’t be posting this banana cream pie recipe here. I will give the taste of this pie an A+ but the consistency an F–it was very creamy (no lumps) but it just wasn’t firm enough. My daughter keeps asking for more–so we’ll be eating it over the next couple days.

img_20180708_083449893

After my pie failure, I decided to go for something easier. How about cold brewed coffee? I had been skimming over the Pioneer Woman’s cookbook and noticed her recipe. I basically followed her General Plan for iced coffee.

I used a very dark coffee bean (Rwandan Coffee beans) and ground them up. Then I scooped 3 large cups of my freshly ground coffee and dumped them into a glass bowl.

Next, I poured 6 cups of COLD water over the coffee grounds and gave it a quick mix with a spoon. Finally, I covered it in plastic wrap, set it on the counter top and let it brew for over 12 hours.

Once the 12 hours were up, I found a bigger glass bowl, a sieve and some paper towels. I strained the ground coffee mixture through the sieve and about 2-5 layers of paper towels (yes, this will take a bit of patience but I promise it works as a PERFECT FILTER and I didn’t get a single stray coffee ground in my final brew!


I poured the cold brewed coffee into a juice dispenser and let it chill in the fridge over night. My only regret is that I didn’t make enough!

Let me tell you, this is the BEST CHILLED/ICED/COLD-BREW COFFEE I’VE EVER TASTED!

Just fill a glass with ice cubes, decant your brewed coffee into the icy mix and dribble in some half and half and a spoonful of sugar (or don’t). Either way, its just luscious!

I thought that the dark roast would be too-overpowering, but it wasn’t at all. It just tasted rich…deeply flavored even after a splash of half and half.

Another thing that I’ve been doing this past month is trying to paint, “The Yellow Christ” by Paul Gauguin. The Yellow Christ has always been one of my favorite paintings of all time. I just find the color scheme breathtakingly original. Gauguin is definitely one of my favorite painters–one of his paintings sold for 300 million in 2015–just to give you some perspective of his classic popularity and talent.

Here is my version:

img_20180708_1925598651

We’re also working on another acrylic painting (this one, 100% my own idea) with my little painting helper beside me!

img_20180708_193019775