FELT IS SO FUN!!!! HOW TO USE IT?

FELT IS SO FUN!!!! HOW TO USE IT?

For a while now I have been experimenting with felt and its sundry uses. You know, that plush, soft, fuzzy stuff that is made from PLASTIC BAGS??!! YES! RECYCLED PLASTIC BAGS! You can get it in sheets at your local fabric store or even places like Michaels, Walmart or Hobby Lobby–usually $1-$1.50 per sheet. I buy a ton when it goes down to 50 cents a sheet at Joann Fabrics.

It looks kind of like this. Always keep a bag of cut-up scraps. Also, have your glue gun handy. This is how I attach cut felt pieces together.

img_20180304_113550829_hdr

Felt is bright and colorful. It’s durable and fun to cut up and use! You can sew it on things. (I cut up my husband’s old shirts and turn them into boy shirts). I finish them off with felt appliques that I design, cut out and sew on. Here are 3 (toddler) boy shirts I made from scratch this week.  2 of them have felt applications. You can see my felt elephant and palm tree.

img_20190131_114309587

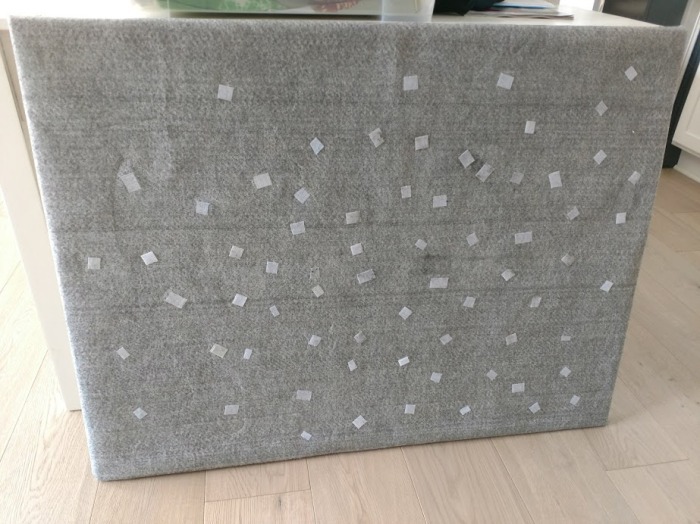
You can also make a FELT BOARD as I like to call it. It reminds me of the flannel graph board that was used by missionaries and in Sunday schools in the 70’s and 80’s. I took an old canvas and covered it with the non-slip stuff that you put under rugs. This non-slip material was being stored in a closet and not being used….so why not?

img_20180304_112643423_hdr

Then you staple it on a canvas or board and put a bunch of velcro pieces on it. Children who haven’t watched a ton of television like to stick the felt pieces on the board and make up stories.

img_20180304_113122846

Like this:

img_20190201_141920415

You can also make your own fun felt books as I have here:

Felt is so much fun! Cutting it out and making your own creations with a glue gun is one of my favorite things to do. Bonus: the kids get a new thing to play with!


I POSTED AN AD FOR A BABYSITTER ON CRAIGSLIST for $10 an hour

I POSTED AN AD FOR A BABYSITTER ON CRAIGSLIST for $10 an hour

When you have children, lots of things change. The biggest thing, for me, has been my thinking. You start to value certain things more—like your time and your freedom. But this has a ripple effect; you start to value your money, your food and all your resources even more.

I think it’s because, as a mother, you’re working much, much harder than ever before. You’re doing ALL the clean-up, housework, diapers, baths, laundry, grocery shopping (maybe with a couple exceptions), bedtimes, meals and meal clean-up (don’t even get me started) and middle-of-the night feedings.

If you are lucky and privileged enough to get a babysitter or childcare worker to watch your children a couple times a month, it’s just heavenly. You can take a break from all the constant chaos that assaults your reasoning faculties—even if it’s just for a few hours.

Additionally, you’re probably looking for more educational opportunities. You know how detrimental– how disadvantageous it is to have gaps on your resume! And there’s lots of proof to back this up.

As a SAHM, you want to find ways to stay afloat in the career world once your children are in all-day school. Boring, repetitive labor makes you want to do less of it. Once you get the opportunity to do ANYTHING ELSE, you really can sink into it, value it and fully appreciate it.

You realize that your precious life is being replaced by labor. It dawns on you how valuable time is—how valuable your time is. Children are important treasures; no one ever said otherwise. Until robot children make their grand entrance, children really are our future, so I agree, we all should be investing in them!

But…it’s all the drudgery and clean-up that makes the situation different. Sure, there are some people who are quite fine with ignoring all the messes and letting them build-up for years in their homes while they instill Shakespearian prose and Euclidian geometry into their young one’s minds, but I’m not one of them. I can’t think when everything is in disarray.

We have moved a few times in the past couple years—from Washington state, To Europe, back to Oregon and now Alaska. I haven’t been able to make friends or establish a social community. I’m not part of a church. And, let me repeat, I don’t have friends in my city.

My Mother, a fervent Fundamentalist Christian whom I love dearly suggested that I “Join a church and I would meet nice ladies who would offer to help out with the childcare.”
But then I imagined having to explain myself: “So, what drew you to our church?” Me: “Oh, I’m not at all religious or a church-goer—I just joined for the free childcare”. You know how that would go–they would all embrace me non-judgmentally and welcome me into the fold without trying to convert me, or not.

The only solution I could summon was to look for a babysitter online. I needed someone for 3-8 hours each week–max and I couldn’t guarantee a set schedule. And what did I do? I first looked on Facebook but couldn’t find much there. In fact, what I did find on Facebook were TONS OF MOTHERS IN MY COMMUNITY LOOKING FOR CHILDCARE AND BABYSITTERS. Not exactly helpful.

I absolutely didn’t want to start an account like Care.com. You have to pay a monthly fee just to get in touch with possible caregivers/babysitters. And, I’ve heard they make it difficult to terminate your account. Not only that, but you’re going to pay a ton for the average sitter that you find. Some of them are asking for $15 to $20 an hour.

I’ve become a bit of a free market capitalist over the past few years. The free market is a better place to go even when finding something like a babysitter. You are probably just as competent to check references and “get a reliable candidate” as anyone else—you might even be pickier in the selection process. After all, they’re your children, you won’t be taking any chances.

WHAT DID I DO?

I posted an ad on Craigslist. Craigslist is free and super easy to use. At this point, you’re probably thinking I’m insane. “What? You posted an ad on Craigslist for a babysitter?” Yes. Yes I did.

But this didn’t happen without spending some time to think about what I was doing. Do people do this? Has anyone else thought about doing this before? I started by perusing Craigslist ads. I wanted to get acquainted with the market.

I only found one Mom who had thought of my idea to post an ad on craigslist. She was looking for someone to babysit her 3 young children. In her ad she said that she was a Christian mother willing to pay $10 an hour and expected all 3 of her little children all in diapers (because she had a set of baby twins and a 2 year old) to be taken care of as well as the bathrooms cleaned once a week and the house kept clean. She wanted a resume, 3 professional references and (obviously) to meet up first in a public venue for an interview.

I thought her ad was a bit over-the-top. What cretin would accept only $10 an hour to babysit 3 children, clean bathrooms and maintain a clean house? That’s like asking for a caregiver and a janitor ALL IN ONE—for only $10 bucks an hour. Would anyone do this? Taking care of young children and keeping things clean is an overwhelming amount of work.

For a week I thought about her ad. What a greedy BIT—um, person. If I post an ad, I won’t be greedy. I’ll say, “I’m giving you $14 an hour to take care of 2 children and you don’t have to do any cleaning.”

But I kept thinking about this woman’s ad. It was a very bold. After a while it began to dawn on me. What if she wasn’t (necessarily) greedy but just understood economics better than I did? I realized that when you post an ad its probably better to start at a LOWER hourly rate than a HIGHER one.

You want to test the market—see if anyone responds. If no one responds to the ad, there’s your answer: you’re low-balling and no one will be interested in the offer. That is, there is no one in the market who will don their services for the price you’re offering. Alternatively, if you offer too much $$ you’ll be slammed with responses. Sorting through them will be a labor in itself.

I decided to start with a very simple ad for a babysitter: “I Will pay $10 an hour for a babysitter. If interested, please contact me and we can plan on meeting at a public location for an interview.”

Once I posted the ad, all hell broke loose

I received an overwhelming number of interested candidates. I had no idea SO many people were looking for work. I received a surprising number of male candidates which I promptly dismissed.

I only respond to female candidate because I tend to trust them more around my children.

I wanted to zero in on the best candidates, so I looked at female candidates with resumes, references and descriptions of what kind of childcare experience they had. I kept these in my inbox and thought about it for a few days.

I had my first interview with a lady whom we’ll call Molly. I met her at Barnes and Nobel. She was there right on time with her resume and references in hand and pressed and polished for our meeting. It felt very odd being the one to “hire” someone.

I thought she was a good fit until I learned that she didn’t have a car and would depend on public transport. The bus stop closest to our house was over 3 miles away. So anytime she babysat, I would have to pick her up from the bus stop. We both decided that she wasn’t a good fit.

I few days later, after being slammed by yet more interested candidates, I met with another young lady at a coffee shop. She was very sweet, professional and ready for the interview. She, too, had references and a resume. After our meeting, I knew she was the one. It’s just one of those gut feelings. I would still go and check up on her references before I decided to have her start.

Would I Recommend Finding A Babysitter on Craigslist?

Absolutely!

All you have to do is:

1. Meet any/all your prospective candidates at a public venue before you decide to exchange phone numbers or even emails.

2. Have your candidate come with a printed resume and a printed list of references. You will also come with your own 6th sense, intuition and brain as you interview your candidate.

3. Always ask your candidate if they have reliable transportation.

4. Ask your candidate about the last place they worked, how long they have been looking for work and if they plan to find other jobs in the meantime (I was only looking for a few hours of sitting each week, so I encourage my candidate to continue to look for work and that “I would work around her schedule”)

5. After you’ve met your candidate and you think you have a possible fit, go home and check references and review the resume with your husband/significant other.

6. Interview at least 2-3 of the best candidates you come across. You want to get an idea of the different kinds of personalities out there and which ones might work best with your children.

7. Have your preferred candidate come over to your house for a test-run. Let them babysit your children for 1 hour, maybe 2 (at most!). You can even be in another room in the house working on another project while she babysits.

8. Ask your children what they thought about the new babysitter.

We found a terrific candidate (FOR FREE) using this process! Craigslist is free. Care.com is not. You’re going to be much more selective for your children than ANYONE ELSE.
We found an amazing babysitter who is real Alaskan—3rd generation—not some recent transplant like ourselves. Her father is a native fisherman and she even brings us FREE seafood—crab, halibut and salmon.

We are so lucky to have found her! She is the ultimate baby whisperer.

img_20181011_124006394

If you use the method I’ve delineated above, you won’t have trouble finding a good, reliable babysitter.

What did I learn from my Craigslist Post?

The major thing I learned from my post was that there are TONS of people willing to work for $10 an hour. LOTS. I can’t emphasize this enough. If I had advertised the position for $14 an hour, my computer would have blown up, truly.

I learned that you trust your intuition when reading through all the (anonymous) craigslist email responses. Only respond to the few that seem to stand out as “good” and “honest” candidates. In addition to a resume, references and a cover letter, my babysitter went to the trouble to send a link to her personal Facebook page so that I could get to know her and see her activities there. She came across as very transparent and honest.

I Reupholstered Our Dining Chairs With KID FRIENDLY Vinyl (2nd time!!)

I Reupholstered Our Dining Chairs With KID FRIENDLY Vinyl (2nd time!!)

Before our big move to Alaska, I was busy reupholstering our dining room chairs. I wanted to finally share the results!

I know what you’re thinking, “Didn’t you already reupholster those chairs a couple years ago?” Yes! I’m still working with the same chairs.

You remember when I bought these (pseudo?!) Chippendale lovelies for only $20 euros a piece at a little flea market in Germany? (That’s right, I got 4 of these CHAIRS FOR ONLY 80 Euros!). If you go to your local Pier 1 Imports, you’ll be spending a minimum of $100-$120 PER CHAIR, so I think I got a good deal.

Malta Trip May 2016 003

Remember I decided to reupholster them so I removed the cushions from the chairs and tore off the old fabric.

I reupholstered all 4 chairs with this black and white striped IKEA fabric:

Malta Trip May 2016 012

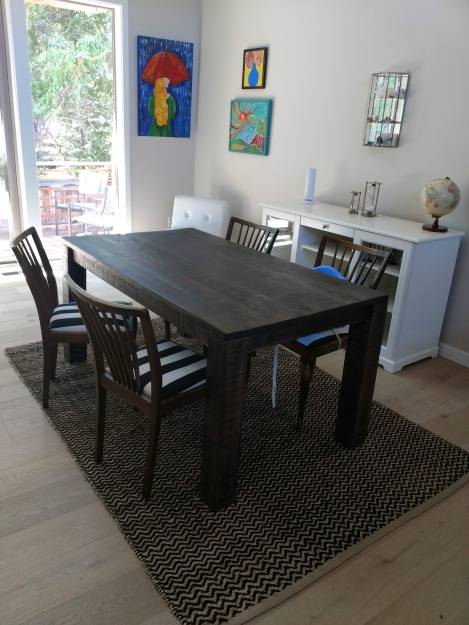
Sensational results, I thought. They looked rather striking with our table here. By the way, I got this solid mango wood table on sale for 250 euros at Mobel Martin (in Kaiserslautern, Germany).

img_20180627_121244653

But sadly as physics would have it, all things are subject to entropy.

img_20180626_154632088

img_20180626_155723330

img_20180626_155702708

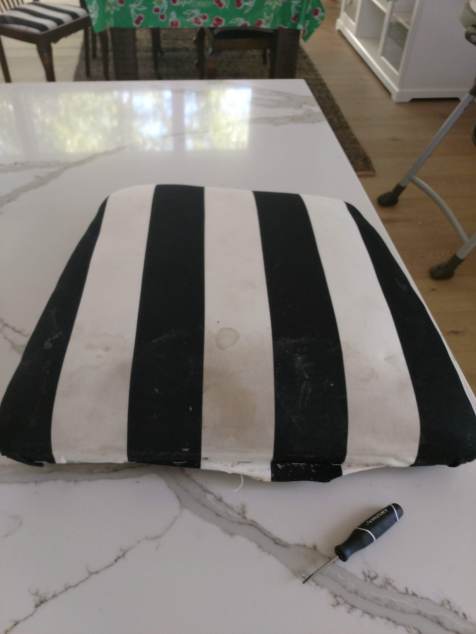
So, once again, two years later, I removed the fabric and decided on different material. How about vinyl? It’s easy to wipe off spills and is far less penetrable than cloth fabric.

I was able to buy a roll of vinyl (4 1/2 yards I think), for around $40 bucks at Joann’s Fabric. Remember to bring in your 50% off coupon for one item to get that price– otherwise you’ll be spending around $80 for that amount.

I chose blue vinyl, regular $14.99 per yard (but half off with my coupon).

Removing old material is usually pretty easy. Just use a pair of needle nose pliers and a little flat head screwdriver. (I broke 2 in the process). Yank off the old fabric and use it as your template for cutting out your new piece of fabric that will cover the chair. When cutting the new fabric, make sure you cut a bigger piece than your previous piece. You want lots of material to work with in order to get it just right.

img_20180626_160808358_burst000_cover_top

img_20180705_093237261_ll

img_20180705_093309138_ll

Just lay the piece of cut vinyl on top of the seat cushion and tape around the underside of the seat first, positioning it in place (not shown here, sorry). Next, use your staple gun and start pulling the fabric nice and tight as you staple the vinyl to the underside, wooden section of the seat.

Here is the underbelly of the seat and what it looks like when you staple it.  As you can, it can be quick and doesn’t have to look perfect. No one will see it.

img_20180705_093342081_ll

img_20180705_094934313_ll

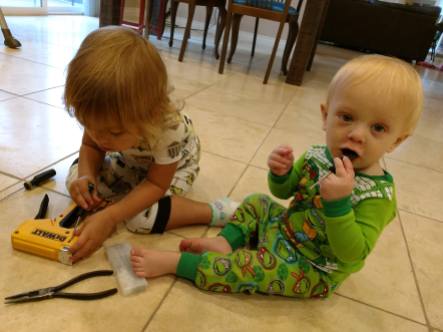
These are the tools I used for my reupholstery job:

img_20181004_182755602

And the kids couldn’t resist playing with them..

img_20181004_1833130761

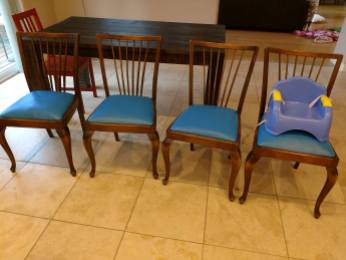
Here are the chairs with the new vinyl material. Maybe not as striking as the black and white fabric, but they sure do wipe off quickly!

img_20181004_182101732

AND….I still have quite a bit of blue vinyl material left. 🙂 Which means this reupholstery job was much less than $40. Come back soon if you want to see yet another reupholstery job I’m working on with this same fabric; I’ve got a more challenging chair.


My Rocket Ship Birthday Cake(Celebrating my Son’s FIRST BIRTHDAY!)

My Rocket Ship Birthday Cake(Celebrating my Son’s FIRST BIRTHDAY!)

“You are not in a contest with other people, you are in a contest with yourself. Every day find ways that you can improve yourself–your character, your efforts, your knowledge, your creativity, your ambitions…your emotions.” –(me–quote from me today)


For my son’s first Birthday, I wanted it to be extremely simple and cheap (use what I already had on hand) but also have some fun and bright memories (and pictures) for future years.

If you’re not into children’s movies/cartoons/videos/characters what to do for a Birthday? I’ve found that a good (and extremely cheap) way to create a “Birthday Party Theme” is to look around your house and take account of toys and books that you already have.

No, I do not go onto the internet first “to look for ideas”. In fact, I highly discourage it because you’ll be intimidated by all the amazingly perfect creations put forth by other experts. You’ll either decide not to do anything–for fear that it will be a failure or you’ll be tricked into thinking that you have to spend a bunch of money “to get the right look”. (I’ve probably been on Pinterest less than 10 times in my entire life! No kidding).

Also, this isn’t very creative is it? The point is, COME UP WITH THE IDEA IN YOUR OWN MIND FIRST and, if you absolutely have to, start surfing around the internet because, say, you forgot the recipe for the frosting you have in mind. You get the picture.

What are a bunch of things already at your fingertips that you can extract a theme from? For us, it was space-related things. Mind you, we only had a couple things in this category, but I thought it would be fun to create a tiny little First Birthday Party for my son along this genre. It would just be our family, of course, since we don’t have any relatives or friends here in Alaska.

I didn’t want to buy a cake; but I did want to experiment with another homemade cake that you form into something related to the theme. After all, I had all the ingredients on hand and it’s more baking practice for me. 

This time, I chose a rocket ship. I used the same white cake recipe I’ve used in the past–extremely boring and not the best flavor in the world–but SUPER EASY TO WORK WITH. You can find it on an earlier blog post of mine called “Pagan Party For Kids” or “My Robin’s Easter Egg Cake”.

Once baked and cooled in the fridge in plastic wrap (overnight), I pulled it out and cut the cake into a rocket ship using a template I made from paper.


And I did a quick frosting job here. No, that’s not fondant, it’s just powdered sugar, butter, milk and vanilla frosting that has been tinted.

img_20180926_1957089241

With a cake like this, we will be flying to the moon in no time.


I also made a couple little rocket ships from cereal box cardboard.

Our Baby having his first Birthday!

Everything pictured here are things that I already had on hand. I didn’t buy a single thing. Even the Birthday candle was my daughter’s when she turned 1! Remember the old phrase, “Reduce, Reuse, Recycle”. Birthday presents were sent to us from Grandma and Grandpa and Auntie, of course.

img_20180927_2010218032img_20180927_2010038781img_20180927_202744218_burst001img_20180927_202738769


British Columbia, The Yukon and Alaska Trip (Recap of our BIG MOVE).

British Columbia, The Yukon and Alaska Trip (Recap of our BIG MOVE).

Ahh, so you’re back to check out my blog! Thanks for showing some interest. This time, I’ll take you on a brief recap of our LONG DRIVE from central Oregon all the way to Alaska.

I can’t believe that we are starting a new life in another world. I only wish I could have had the time to go over our journey in detail– and describe it to you to accurately capture it’s magnitude.

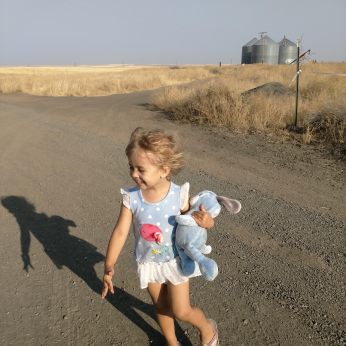
We traveled for over a week. Our road trip began in Central Oregon and ended in Alaska. Below: Our trip started out in dry, central Oregon. Here is our darling Clementine–just past the Ghost Town of Shaniko. Wheat fields begin to emerge.

For 7 days we stayed in motels, hotels and lodges in Washington state, British Columbia, the Yukon and finally, Alaska.

As a child I would think of the northern Washington border as where the land ended. It was a fuzzy, almost invisible place in my mind. You can imagine my surprise when we crossed the northern Washington border into another country– Canada–and entered into the Grand, seemingly endless expanse of British Columbia!

We were lucky to have my parents come along for the journey. They helped with the looooong days of driving both our vehicles–with a screaming 10 month old in the backseat (sorry Dad!) and a demanding 2 1/2 year old in the other one.

One of the things you’ll notice about Canada is that once you cross the border–everything appears more orderly…less sprawling. Space seems to be used and conserved more neatly. Even the people are in better shape. I didn’t realize how many vineyards there were in British Columbia! Remember to turn on your headlights when driving in Canada–even during the daytime.

You’ll notice two prominent fast food chains that seem to pop up in every city–Tim Hortons and A&W. We shuddered when we heard the locals refer to Tim Hortons as “Timmy’s”; of course, they could have referred to it as “Horty’s” which would have been even worse. It’s a coffee-bagel-doughnut-sandwich shop all rolled into one that the Canadians seem to be quite proud of.

If you aren’t aware, Canadians frequently use expressions like these:

1. You Betcha’

2. Oh

(Fun Fact: Like Canadians, Liberians are another group of people who use the expression “Oh” and attach it to the end of some sentences to add emphasis and drama).

3. Whenever the word “out” was used, it sounded more like “oat”–as in Quaker Oats.

Kelowna, British Columbia.

This place would have been SURREAL had it not been for the cloaking of smoke that suffocated the entire province during our travels.

If you have a chance, type the words “Kelowna, BC” into Google. You’ll be shocked that such a gorgeous city exists–and you never even heard about it. There is an incredible lake in Kelowna with beaches, docks and scenic boatyards. A park wraps around a section of the lake just walking distance from downtown. There you’ll find resplendent flower beds like these.

img_20180814_173716464_hdr-effects

Kelowna is cute–and tight–with a sufficient population to make you feel like “You’re in the big city”. I hear that this lovely Canadian city is GROWING–one of the fastest growing cities in Canada. I’m sure on a sunny day you can see the beautiful city with the lake in its fullness and the vineyards that surround it in the distance.

I met a couple amicable bums in Kelowna and I found a little clock tower..

Valemount, BC

We stayed at a Super 8 motel here run by a friendly Indian couple. It was super clean too. There’s a little seating area and fireplace in the lobby with (if I recall) Elk racks on the walls. You feel as if you’re about to embark on some grand hunting expedition.

Valemount is a perfect launching-off spot if you want to head into Alberta and check out Jasper National Park.

Jasper National Park, Alberta.

Even with all the smoke, we were riveted by this glorious National treasure. Think of Yellowstone on Steroids. Nah, it doesn’t even come close with these towering peaks!

Dawson Creek, British Columbia.

This is where the famous Alaska Highway begins … ALCAN HIGHWAY.

Northern Rockies Lodge, British Columbia

I can’t find adequate words to capture this spot. Northern Rockies Lodge was, by far, one of the best experiences of our trip. It was the quintessential mountain lodge made of hewn logs, hidden inside the northern-central region of British Columbia–AWAY FROM EVERYTHING. You even get a Canadian cowboy strumming a guitar in the middle of the dining area singing country tunes.

img_20180817_195639831_burst0011

Our Lodge on Muncho Lake. They offer little float plane rides into the mountainous scenery for $250 a person.

I highly recommend this place if you ever happen to be in the tip-top North of British Columbia (in the summertime, of course). You’ll go through some stunning mountain territory just to get to the lodge. Then, you’ll be ready for an Alpine dinner! Wait…I feel like I’m in Switzerland.

img_20180817_202904950_burst001

We even came across a mama and baby moose in the middle of the road. If you take a moment and squint, you can see the moose in my very professional video here. I didn’t want to get out of the vehicle. Moose are 1000 lb animals and they can charge. My husband was driving the car in front of us.

The scenery in the Northern region of BC is terribly dramatic. I want to go camping here someday.

img_20180818_093153686_hdr1
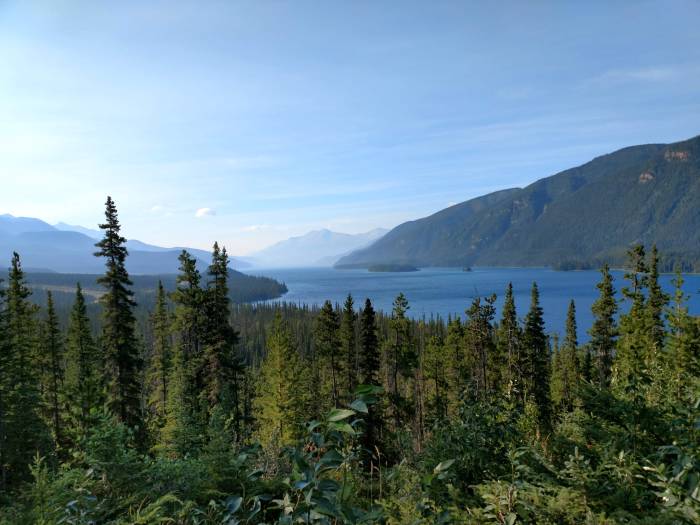
NORTHERN BRITISH COLUMBIA. MUNCHO LAKE.

Dad making a wild buffalo angry. Wilderness in Northern BC

My Video: I’m walking towards these mountain goats/sheep?

Yukon Territory

This place is weird but truly amazing! We were accosted by people dressed up like unicorns at the Yukon border. This never happens.

You gotta check out the visitor center once you get into the Yukon. My little baby boy was happy to be with Grandma!

Ahh, the splendor of the Yukon territory. Crisp, pristine and unspoiled by annoying campers. It unfolded in all its glory for us to see. If you want to get away from tons of campers and hikers (and actually enjoy the scenery) the Yukon summons you.

MY DAD LEFT ME STRANDED IN THE YUKON WITH NO CELLULAR RECEPTION

I WAS BUSY TAKING SELFIES OUTSIDE OF OUR CAR AND MY DAD (also taking pics on the other side of the road) HOPPED BACK INTO THE CAR AND TOOK OFF WITHOUT ME! I WAS LEFT STRANDED IN THE MIDDLE OF THE YUKON BY MYSELF WITH NO INTERNET OR CELLULAR/PHONE connection.

All I can remember is watching my Dad hop back into the vehicle and floor it down the road. “WAAAAAAAAIIIIIIIIIITTTTTTT! DAAAAAAAAAAAAD! DON’T GO! I’M STILL HERE! If you were a bear you could hear me screaming in the middle of the road as he left me in the dust. No one anywhere. No towns for miles. Cars almost never passing. Nothing. Just brutal, beautiful nature. Oh, and there are TONS of wild animals here!

Fortunately my Dad noticed I wasn’t in the car about 45 minutes later (He thought I had fallen asleep in the back seat) and turned back around. This was a very memorable experience.

Whitehorse, Yukon

I can’t stop raving about this place. This is one of the most awesome spots on the planet. The Yukon river flows swiftly beside the city of Whitehorse. There is a quaint little downtown with great restaurants. There’s even a rainbow colored crosswalk for all of you LGBTQ folk. We found a cool Totem pole here–picture below.

I encountered a white Canadian Photography couple who were taking photos of a native Canadian man, carving a moose (or elk?) rack. When I asked if I could take a picture of him carving the rack too, they all three stared at me in disbelief.

Where are you from?” the white man asked. “I’m from Bend (Oregon).” “Where are you from?” I asked back. “Well, we’re from Yellowknife (Northwest Territories).” And it ended like that. Go figure. They’ve probably got more street cred than I do.

In the summer, the sun seems to shine brightly with tons of blue sky. The air is so refreshing here that you’ll be instantly purged of toxins. The mountains that surround Whitehorse are at your fingertips offering trails galore. If you hate the cloying heat in the lower/middle parts of the globe during summertime but enjoy the sun…the bright light….this place is just for you!

Tok, Alaska.

Clementine stacking the creamer containers while waiting for food at Fast Eddy’s. (Paradoxically, you’ll wait for a long time to get your food here.)

img_20180820_075157290

The last part of the drive!

img_20180820_124118153_hdr
We ended our trip in Anchorage, Alaska. To find out more, please keep following my blog!

Visiting the Painted Hills and Exploring the Wild West Town of Mitchell, Oregon!

Visiting the Painted Hills and Exploring the Wild West Town of Mitchell, Oregon!

We’ve only been in central Oregon for a year and we haven’t explored enough! I’m the type who would be off exploring the Wild West and hitting up every possible western town thinkable but with years of very little sleep and toting two young ones– my motivation has dipped.

I arrived pregnant. Three months later we had our 2nd baby. As anyone with a new baby knows, these past 9 months have been a blizzard of crazy. Hectic, sleepless nights and seemingly endless hours of screaming during the day. Who says babies sleep all the time? They most certainly do not, and if you can get them to nap for two 20 minute naps in a day, you’re lucky!

Lately though, I’ve been getting more rest at night and we’ve been getting out more! It’s like life is enjoyable once again.

This past weekend we made a sudden escape to the REAL wild west. Unlike manufactured, hyped-up, touristy places like Bend or Sisters Oregon, we hit up Mitchell (population 130), which appears to be the real deal!

We met terrific residents in this small Oregon town. The man in the picture below sells rocks under this canopy. He finds them around the canyons and hills in the John Day Fossil areas. He told us about PROSPECTING FOR GOLD in some of the nearby creeks. Not a lot left. Apparently the Gold Rush is over.

MITCHELL RESIDENTS ENJOYING THE HOT AFTERNOON WITH A DRINK. THEY ACTUALLY LET ME TAKE THEIR PIC!!!!

If you look closely at the picture below, you can see locals sitting outside the cafe near the “Open” sign having a Saturday morning chat. These are NOT tourists. They’re locals. You really feel like you’ve gone back into time. It’s surreal!

Next to the cafe, the general store greets you with well worn hard-wood floors and elk and deer racks all over the walls. The shelves are sparsely stocked with goods. The locals say they drive 1 1/2 hours to stock up at Costco in Bend.

Here is Mitchell’s famous Chinese Apothecary–established in the 1800’s.

img_20180721_152034153

We also scoped out the glorious Painted Hills 8 miles outside of Mitchell.

I will be back. Maybe in the next few days or weeks…or years. This is a highly underrated place for all its breathtaking beauty. My only fear, RATTLE SNAKES!!!!! I told my husband that they needed to invent some kind of special shoe to walk around this place–don’t snakes go for your ankles and lower legs? And then, a lightbulb moment hit. These shoes have already been invented long ago—they’re called COWBOY BOOTS. DOH

img_20180721_170346486_burst001


TRYING STARBUCKS SALTED CREAM COLD FOAM BREW & VISITING CLINE FALLS NATIONAL PARK, OREGON

TRYING STARBUCKS SALTED CREAM COLD FOAM BREW & VISITING CLINE FALLS NATIONAL PARK, OREGON

I love blogging. It hits the spot. It’s like my little punch of dopamine. Some play video games; I try and weave a blog post together. And neither of us will judge the other, okay? It pulls me out of the daily monotony and displaces time doing physical labor–something I’ve grown to DESPISE.  Unloading dishwasher…diaper changing…folding clothes….putting things away constantly….cleaning out the car…cleaning up after meals….grocery shopping….weeding the front flower bed….putting things away….picking things up….bathtime….getting up throughout the night (for almost 3 years now) to feed screaming babies….and never enough rest or time to do the things I desire to do.

Someday people will look back at our current time and instead of saying “There’s an app for that”, they’ll be saying “There’s a robot for that.” Imagine how much more free time future people will have for video games and surfing the internet while ignoring 3-D humans by enslaving semi-humanoids/Robots? Bonus, we won’t need to go to college either. There will probably be some way of downloading information straight into our brains…perhaps some attachment device to our brains so specific kinds of knowledge integrates and adds to our own minds! Why bother studying when you can just BECOME MORE AWARE, MORE knowledgeable with just the press of a button? BYE BYE AlZHEIMERS, BYE BYE  Double Digit IQ.

Today has been hot. HOT. I think it’s 102 degrees and we don’t have an air conditioner. Instead of enjoy the balmy 87 degree house temp, I thought getting out and hitting some air conditioned stores would be best.

We began with Tuesday morning Storytime at the library. If you live anywhere near Bend (Oregon) you can appreciate all the FREE CHILDREN’S ACTIVITIES here! Summertime is dense with activities, everything from parks galore to free lunches, free crafts and games with terrific staff. There’s also free music (but not free food) at Drake Park on Thursday evenings. Don’t forget Farmer’s Market downtown on Wednesdays!

MY CHILDREN AT TUESDAY MORNING LIBRARY STORYTIME


After Storytime, we headed over to Target to try a SALTED CREAM COLD FOAM BREW offered by Starbucks. WHAT A SUPRISING CONCOCTION! Delectably creamy, deeply-brewed with a tingle of salty aftermath. If you don’t mind a bit of salty flavor, you’ll really enjoy this drink! My daughter also requested her first CAKE POP upon spotting a row inside the glass pastry shelf. In case you needed to know, we actually went to Target to purchase baby food and my daughter’s first set of underpants. Milestones are underway.

I WANT SALTED CREAM COLD BREW COFFEE MAMA! PLEEEEEEASE!!!

img_20180717_145442974_hdr2

Trying her very first CAKE POP! What an irony for such a hot day.


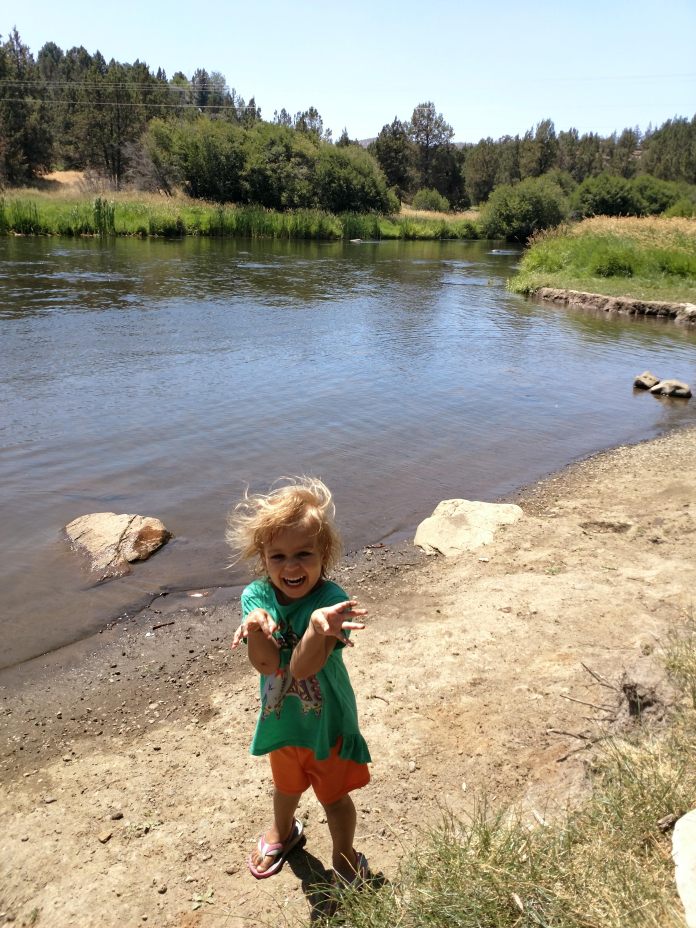
We also spent a chunk of the hot day at Cline Falls State Park. This is a very beautiful region in central Oregon near Redmond–like the quintessential ‘oasis in the desert’. You’ll see the usual scrubby evergreen trees and earthy terrain and suddenly you’ll spot the river and it’s grassy green banks.  It will settle your soul, akin to taking a deep breath on a hot, parched afternoon.

Since I had little one’s we didn’t make it to the Falls section, but we did find multiple “beach spots” to play along a calm section of the river. I highly recommend it here–especially for little ones. There are so many gentle wading areas and deeper, yet easy flowing areas for a nice float.  There are plenty of picnic tables too! Just make sure to go on a weekday and earlier in the day too. You’ll easily find a spot to enjoy the river. We found some nice companions there who offered us freshly picked cherries. 

Enjoying the Deschutes River near Cline Falls:


COLD BREW COFFEE RECIPE and PAINTING GAUGUIN’S, “THE YELLOW CHRIST”.

COLD BREW COFFEE RECIPE and PAINTING GAUGUIN’S, “THE YELLOW CHRIST”.

This week has been one heck of a ride. Lot’s to be excited about and lots of future adventures on the horizon that I’ll be blogging about. I’ve been doing some “copying” lately with regards to recipes and, well, famous paintings. Learn from the best right? Sometimes creativity is playing around with other people’s ideas–make sure and give them ALL THE CREDIT, of course.

Another thing…I failed at a scratch banana cream pie. I noticed that I had extra whip cream and some bananas (about to go bad), so why not attempt it? It turns out that cooking custard and getting a desirable consistency is something only genius cooks with arcane culinary and mathematical skills can master.

Here is my pie. But I won’t ruin your moment and display the runny, slushy middle. It tasted AMAZING. Impeccable freshness with a deliciously thick homemade graham cracker crust. However, the consistency of the filling was WAAAY off–even after allowing it to set for 6 hours uncovered in the fridge.

Making a “firm enough” custard filling is one of those precarious situations. You better not undercook or overcook it and it has to be done accurately within 5-7 minutes on your stovetop. You have to stir rapidly during the boiling process (no distractions or multi-tasking). Oh, and don’t let your custard brown on the bottom of the pan during your 5-7 minute boil. It’s very difficult to achieve a decent result because the parameters are so strict. Don’t accidentally scramble the eggs either–you’ll get lumps.

I don’t want any liability or litigation, so I won’t be posting this banana cream pie recipe here. I will give the taste of this pie an A+ but the consistency an F–it was very creamy (no lumps) but it just wasn’t firm enough. My daughter keeps asking for more–so we’ll be eating it over the next couple days.

img_20180708_083449893

After my pie failure, I decided to go for something easier. How about cold brewed coffee? I had been skimming over the Pioneer Woman’s cookbook and noticed her recipe. I basically followed her General Plan for iced coffee.

I used a very dark coffee bean (Rwandan Coffee beans) and ground them up. Then I scooped 3 large cups of my freshly ground coffee and dumped them into a glass bowl.

Next, I poured 6 cups of COLD water over the coffee grounds and gave it a quick mix with a spoon. Finally, I covered it in plastic wrap, set it on the counter top and let it brew for over 12 hours.

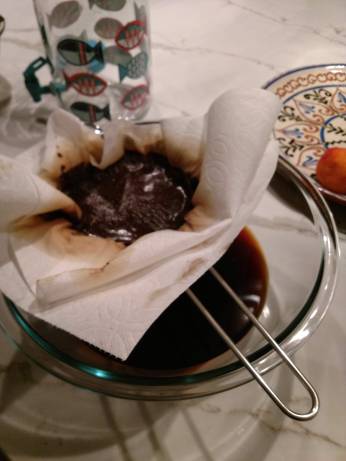
Once the 12 hours were up, I found a bigger glass bowl, a sieve and some paper towels. I strained the ground coffee mixture through the sieve and about 2-5 layers of paper towels (yes, this will take a bit of patience but I promise it works as a PERFECT FILTER and I didn’t get a single stray coffee ground in my final brew!


I poured the cold brewed coffee into a juice dispenser and let it chill in the fridge over night. My only regret is that I didn’t make enough!

Let me tell you, this is the BEST CHILLED/ICED/COLD-BREW COFFEE I’VE EVER TASTED!

Just fill a glass with ice cubes, decant your brewed coffee into the icy mix and dribble in some half and half and a spoonful of sugar (or don’t). Either way, its just luscious!

I thought that the dark roast would be too-overpowering, but it wasn’t at all. It just tasted rich…deeply flavored even after a splash of half and half.

Another thing that I’ve been doing this past month is trying to paint, “The Yellow Christ” by Paul Gauguin. The Yellow Christ has always been one of my favorite paintings of all time. I just find the color scheme breathtakingly original. Gauguin is definitely one of my favorite painters–one of his paintings sold for 300 million in 2015–just to give you some perspective of his classic popularity and talent.

Here is my version:

img_20180708_1925598651

We’re also working on another acrylic painting (this one, 100% my own idea) with my little painting helper beside me!

img_20180708_193019775


Boxed Brownies For Imbeciles!!!

Boxed Brownies For Imbeciles!!!

I apologize if my brownie blog post conjures up feelings of oppression or triggers anxiety. I’m happy for you if you’ve already mastered the astute skill of boxed brownie making and I’m not sure I can offer anything in this post.

This post is actually for ME! Because I’m incompetent when it comes to brownie-making. I’m posting it here so that I can refer to it for my future brownie-baking endeavors.

I’m 37 years old. I’ve never, ever made decent brownies to save a squirrel. I’ve tried baking them from scratch. I’ve tried making every possible boxed brownie mix I could find but never any success. NEVER.

Like many, my problem isn’t with flavor (who can’t add a few marshmallows, chocolate chips, nuts or whatever–as if that’s brilliant?). My failure has always been with texture…consistency…how they swim and melt on my palate. In the end, the brilliance is in the baking.

I always make brownies either A. Undercooked or B. So hard and tough that you feel like you’re eating beef jerky.

THE TWO THINGS I LEARNED ABOUT MAKING BOXED BROWNIES?

Over the past few months I’ve been doing some brownie research. Why does this ALWAYS happen to me? I’ve discovered that there are a couple reasons.

The first thing that I kept coming across was that in order to achieve a chewy, gooey texture with adequate density and thickness (but still baked properly) you need to make a double batch (2 boxes of brownie mix) and bake in a 9×13 aluminum pan!

The second thing is to mix the wet ingredients separately, add them to the dry ingredients, and let your mixer swirl the ingredients for just a few seconds–just until they are imperfectly wet and mixed. If you beat the ingredients too long, your brownie batter develops air pockets and makes the texture more like a cake than a brownie.

Today I finally made brownies that tasted delicious, but even better–had the correct “brownie-texture” once I followed these simple rules:

  1. Use 2 boxes of brownie mix. I used this one:

img_20180702_153604349

2. Double all your ingredients as per your box (obviously, you’re using 2 boxes).

3. Mix the wet ingredients separately and completely.

4. Add wet ingredients to dry ingredients and beat with mixer just until mixed.

5. Smear a decent layer of vegetable oil all over a 9×13 aluminum pan.

6. Pour brownie batter into super greasy pan.

7. Heat oven to 325 degrees.

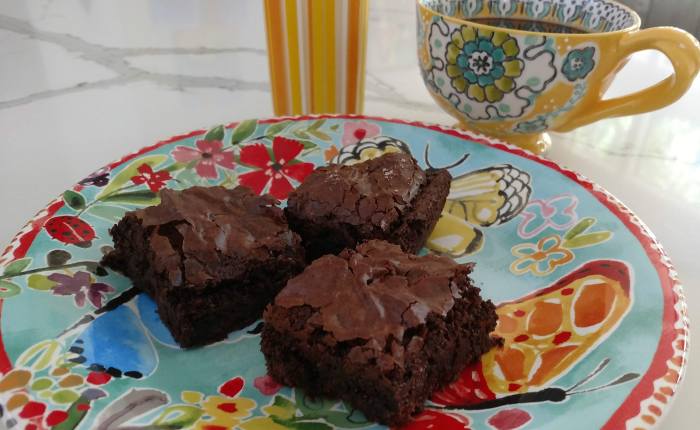
8. Bake the brownies for 50-53 minutes. I baked mine for 51 minutes and they turned out perfectly gooey inside with a crackly top.

8. Let your brownies cool (and continue to cook in pan) for over 1 hour after you pull them out of the oven. I cut mine after about 2.5 hours.

They are still gooey inside but sufficiently baked! This has been my struggle!! Finally I have a decent brownie plan for future brownie creations.

img_20180702_1451094941

Refurbishing Vintage Baby Shoes with SPRAY PAINT for less than $4.00!!!

Refurbishing Vintage Baby Shoes with SPRAY PAINT for less than $4.00!!!

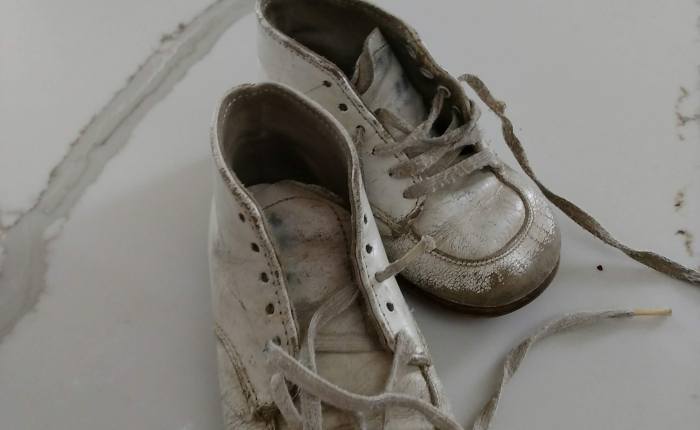
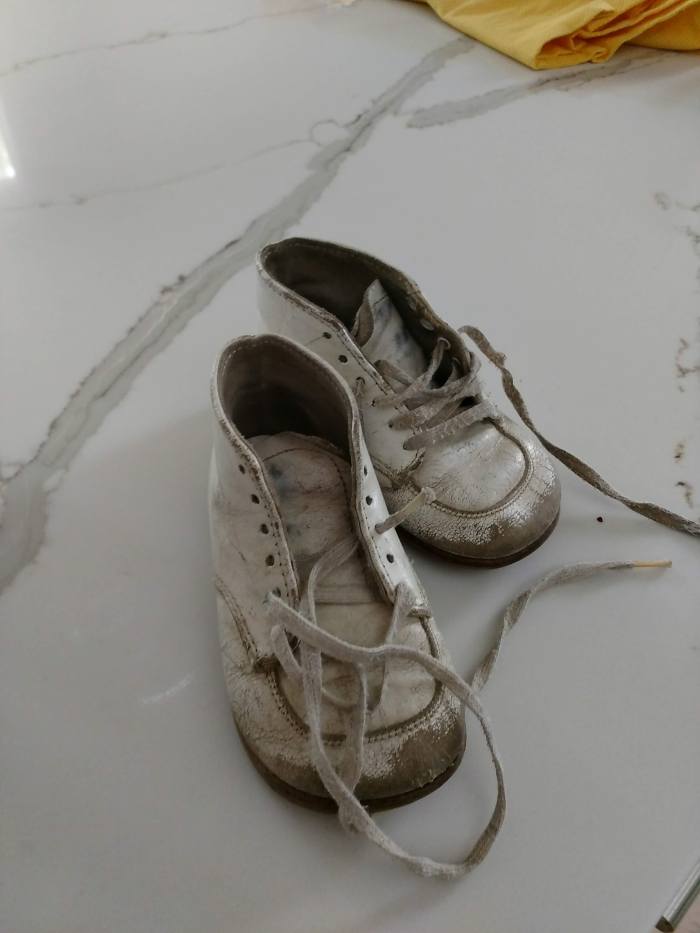
Not long ago I was at my Mom’s house, rummaging through a box of one of my brother’s “keepsakes” and “baby items”. This box was no younger than 38 years old and wedged tightly on the cement floor of the storage room–at the bottom of the shelves. As you know, I’m always looking for an interesting, useful find and wanted to see if there was anything that could be salvaged and used for my little ones.

Sure enough, I found the perfect pair of baby shoes in all their aged radiance and splendor! I think these are much, much older than 38 years, but who cares? 

img_20180614_1646217942


I decided that I would take these little cuties on a 5 hour drive back to our house in central Oregon and see if I could fix-them-up.  After all, they would still be sitting in that box in the basement for the rest of their existence, so why not? I decided on glossy white spray paint. Here is the one I used:

img_20180614_164633400

MY METHOD:

First, I used a very fine grained sand paper and sanded the rough areas of the shoes. Next, I washed them with soap, water and a toothbrush. I allowed them to dry over night. The next day I applied painters tape to the parts of the shoe that I didn’t want to be touched by paint.

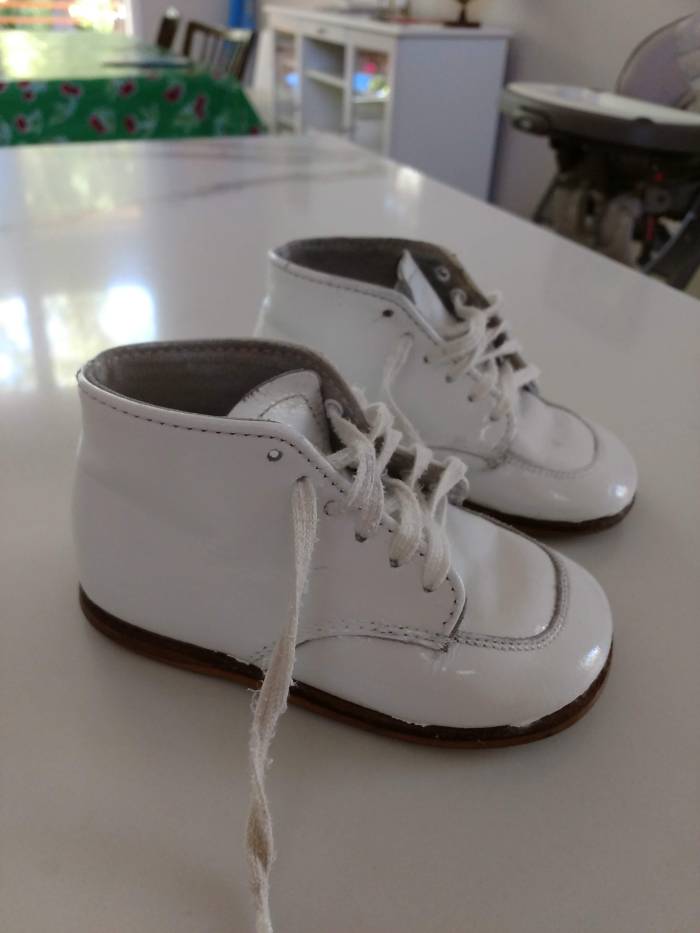
I spray painted the shoes 1x and let them set and dry for over a week. Then, I spray painted them a second time. I separately washed the shoe laces with soap and water and then put them in a small bowl with 2 teaspoons bleach, 1 tablespoon of baking soda with about 1 cup or so of water. I allowed them to sit for a couple hours and then rinsed them and let them dry on the window sill. Finally, I laced up the shoes and voila, here is my result.

These shoes looked rejuvenated and ready to wear when baby boy is a little bigger. Not perfect, but certainly much better than before. I’m excited how they turned out and even more excited that they can be used again instead of sitting in a box, buried in a basement somewhere in eastern Oregon.


img_20180626_102729669


Thank you for checking out my little blog. There will be lots to write about with all of our upcoming adventures.