Crescent Rolls With a Twist (also, cheap and trashy cardboard Christmas Tree Ornaments)

Crescent Rolls With a Twist (also, cheap and trashy cardboard Christmas Tree Ornaments)

To get this fantastic Crescent Roll Dough, head over to this website for a great recipe:

Crescent Roll Dough

I’ve used this recipe 2 times now and have been very pleased with the results. The first time I made cinnamon rolls (super yummy!) and the second time, I made the crescent rolls.

I added things like: chocolate chips and fresh cranberry sauce. I added chocolate chips for a few of them. I mixed up my homemade cranberry sauce and brie cheese in a few others. I also tried a mix of chocolate chips and cranberry sauce. It was a brunch delight.

One has chocolate chips. The other has Brie cheese and leftover (homemade) cranberry sauce for Thanksgiving! You can freeze cranberry sauce and thaw it when you need it again 🙂


Here are some more:

Wrap them up in whatever conformation you desire.

img_20181124_1154393055915859607375224218.jpg

And pop them in the oven.

img_20181124_115728055_hdr2751267031510183017.jpg

Remove them from the oven when they are baked. (I followed the baking directions of the recipe linked at the top of this blog post. I HIGHLY recommend that you use this recipe too!)

img_20181124_121248502_hdr1732587861364314198.jpg

This was a great way to use up the remainder of my crescent roll dough.


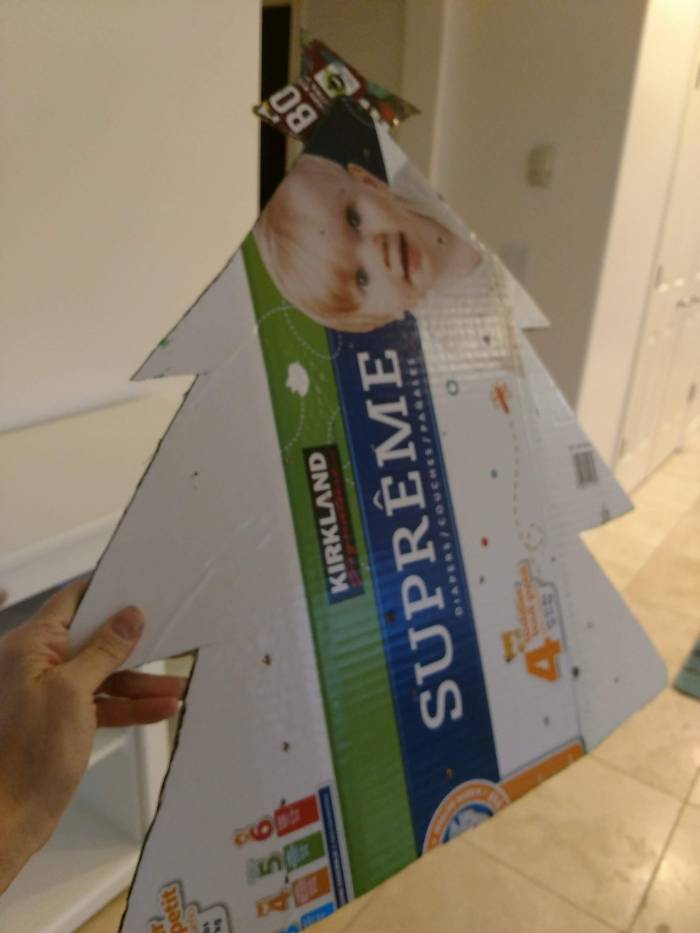
Cardboard Christmas Tree Ornaments

Find some cardboard. I used cardboard from a diaper box. Cut your cardboard into Christmas shapes or whatever comes to your mind. Get glitter. Get paper clips so you’ll be able to hang them up. Get a glue gun. Find paint and paintbrushes. Also, I like to add various embellishments from my stash of old beads, unpaired earrings and broken jewelry.

IMG_20181201_153630464

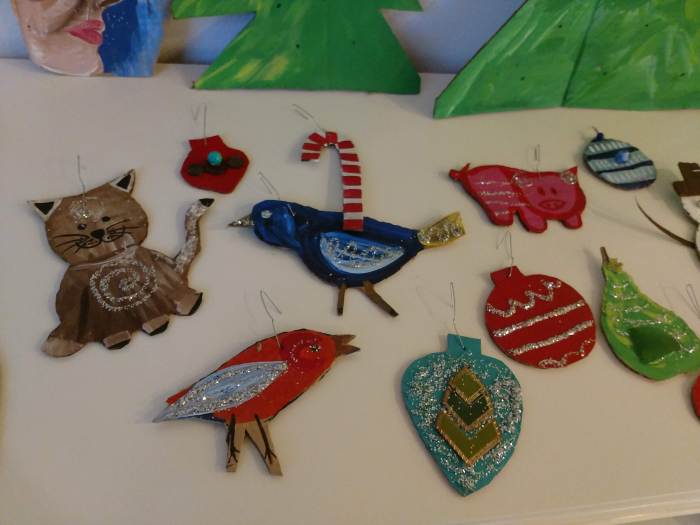
I also reused cardboard from other random boxes and then I painted the front of the ornaments, added glitter and glue-gunned random embellishments.

GRR IT’S A BEAR MARKET OUT THERE TODAY!!!!!!!!!!!!!!!!!!!!!!!!!!!

I like my pomegranate ornament:

IMG_20181201_211638714

And here are a bunch of our other ornament creations!

IMG_20181201_154120815


And a turtle my daughter and I made together:

IMG_20181201_211627064

And another fun one:

IMG_20181201_211631239

Finally. A snowman.


Merry Christmas and Happy Holidays from our home to yours 🙂


My $5.00 Thrift Store OTTOMAN REMODEL. BEFORE AND AFTER

My $5.00 Thrift Store OTTOMAN REMODEL. BEFORE AND AFTER

Anchorage Earthquake Recap

We made it through the big 7.0 earthquake here in Anchorage, Alaska (Friday November 30th 2018 at 8:29am). Thank you very much! There were no fatalities here, just lots of damage to our city. We have lots to be thankful for right now–especially for people. We thank scientists, engineers and strong building codes. The famous Haiti earthquake of 2010 killed 300,000 people and was also a 7.0.

Where was I during the earthquake? In the kitchen. I had just finished cleaning up after breakfast. As usual, Samson was covered in food and would need the usual 5-7 minute wipe down. I looked at the clock. It was 8:21 am. I removed him from his highchair and he started to wander into the living room. I started to walk to the coffee pot when I started to hear a rumble and a little shaking. “Earthquake” I shouted.

Without hesitation I scooped up both of my children. I dashed right into the hallway/doorway area. All I could do was shield both of them with my body as the house began to shake uncontrollably. The house was having a grand mal and I didn’t know what to do.

The painters, who earlier in the week were at the tip-top of a giant ladder painting our 20+ foot tall walls had now progressed to the shorter walls in the hallways and kitchen. As luck would have it, neither were on a ladder when the big quake started.

All I remember is a lot of real fright and cursing from all of us. I guess it didn’t last that long. But it seemed like an eternity. Both of our painters were life-long Alaskans. “Is this fairly normal to experience this?” I asked during the quake. “No. Never felt anything like this.” they said.

This past week has been one seizure after another…one aftershock after another. Sometimes I feel like I’m on a boat at sea.

My Thrift Store Ottoman Remodel

On the brighter side, I finally finished the ottoman I have been incrementally working on for 2 months.

In October I came across this old $5.00 Ottoman. I had to snatch it. Of course, a refreshment would be needed.

And here is a close up. The top vinyl covering was starting to break down.

img_20181020_103704164

Good news. The underlying structure and foam padding on this Ottoman were in terrific shape. All I needed to do was cut off the old vinyl fabric right along the seams and learn how to sew a snug, new one. Another sewing challenge for me.

  1. Cut off all the vinyl material that covers the ottoman along the seams. Avoid puncturing the underlying foam.
  2. Keep the old material that covers the ottoman. You will use it as your pattern for sewing a new one. Find some material (or vinyl) that you’d like to be the new cover. I used leftover vinyl from this project!
  3. Once you sew the cover for the ottoman, find a neat decorative fringe/trim at Joann’s Fabric to attach to the bottom part of the vinyl. These are a bit spendy. However, just bring in your 50% coupon to use for one item and you can get 2.5 yards of this fancy stuff for around $20. I attached this trim by sewing it onto the bottom, open section of the vinyl. You could probably glue gun it, but I wanted it to be securely attached for a LONG TIME.
  4. Once you sew your vinyl cover and before you snug it onto your ottoman, put it in your dryer for 10-25 seconds on LOW HEAT. Do this with extreme caution! I thought of this idea and realized that it works, but do it only for a few seconds on low heat. It will soften the vinyl just enough so that you can fit it around your ottoman.

YOU WANT TO GET THE BEST POSSIBLE FIT SO THAT IT DOESN’T LOOK TOO FUNKY.

Here is the old vinyl that I cut from the ottoman. Use this as your pattern to sew your new cover. You get the idea.

Here is the finished product.

img_20181203_130101755_hdr1